Goal
Very often a company need pages like “What we do”, “Who we are”, “Our branches”, “Our past clients” etc.
In this post we will see how these pages could be added to a Frappe or erpnext powered site. We will add these pages using Web Page doctype available on desk.
We will be using Desk environment and not www/ approach which requires making code level changes.
Setup
This post assumes that you have a frappe project initialized and you are able to add a site to your frappe installation.
Let’s add a site
$ bench new-site foo.bar
Creating What we do page
Navigate to the desk and under desk navigate to Tools > Website > Web Page > New.
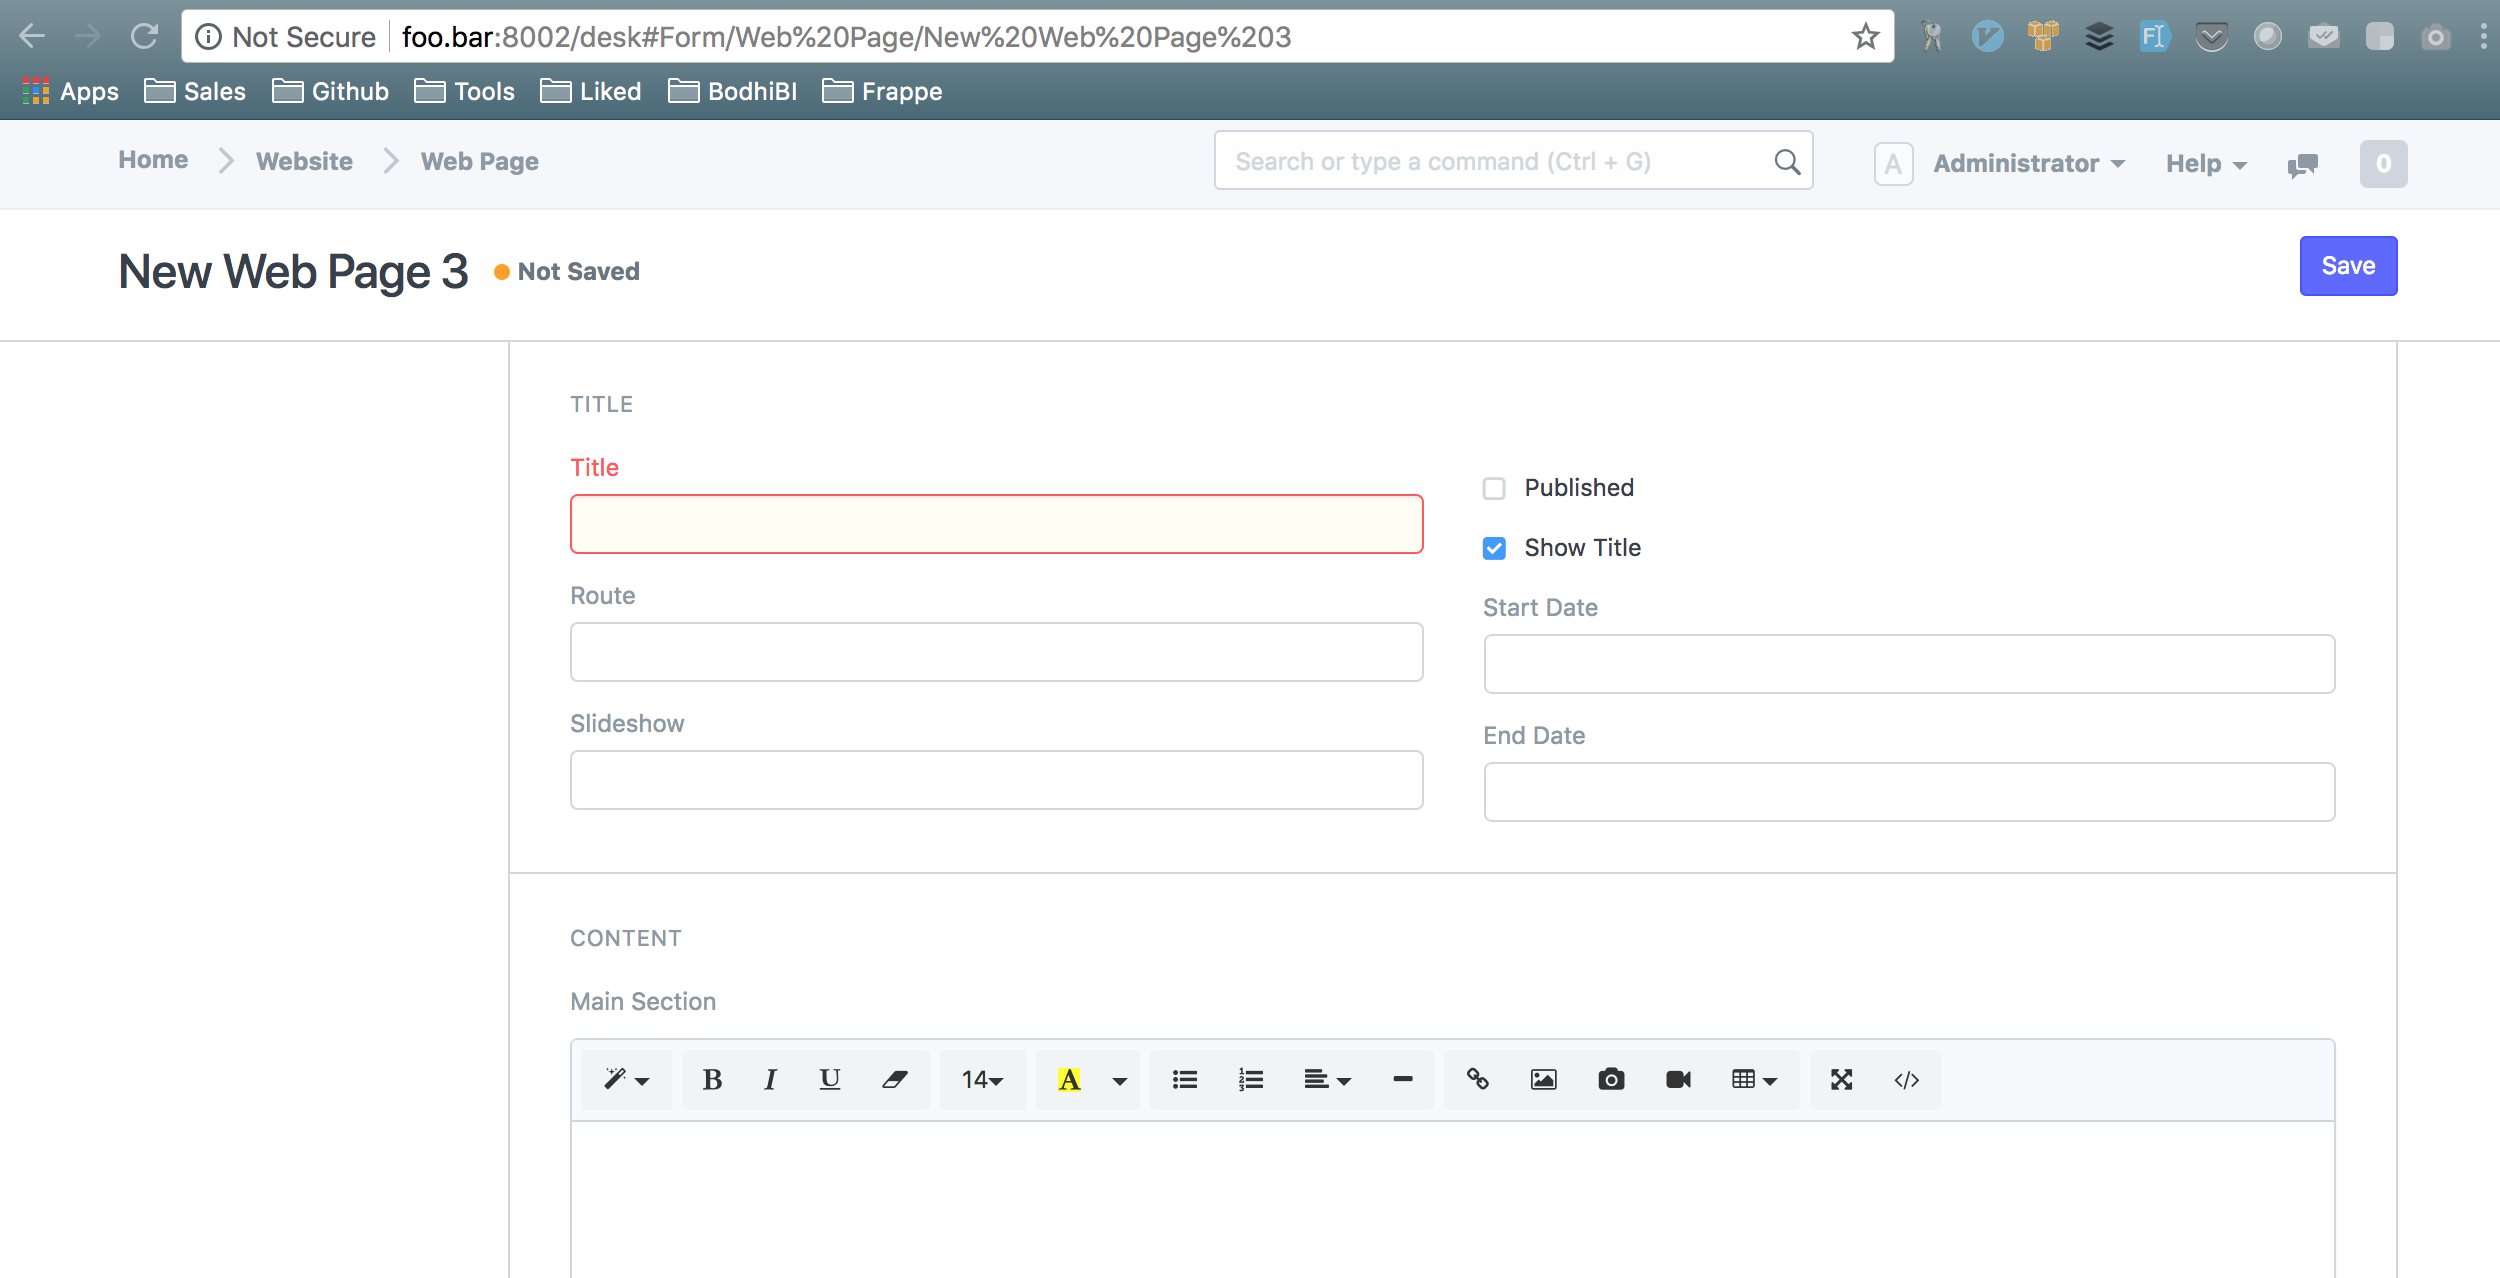
Let’s add a ‘What we do’ page. Add the following things in the relevant fields.
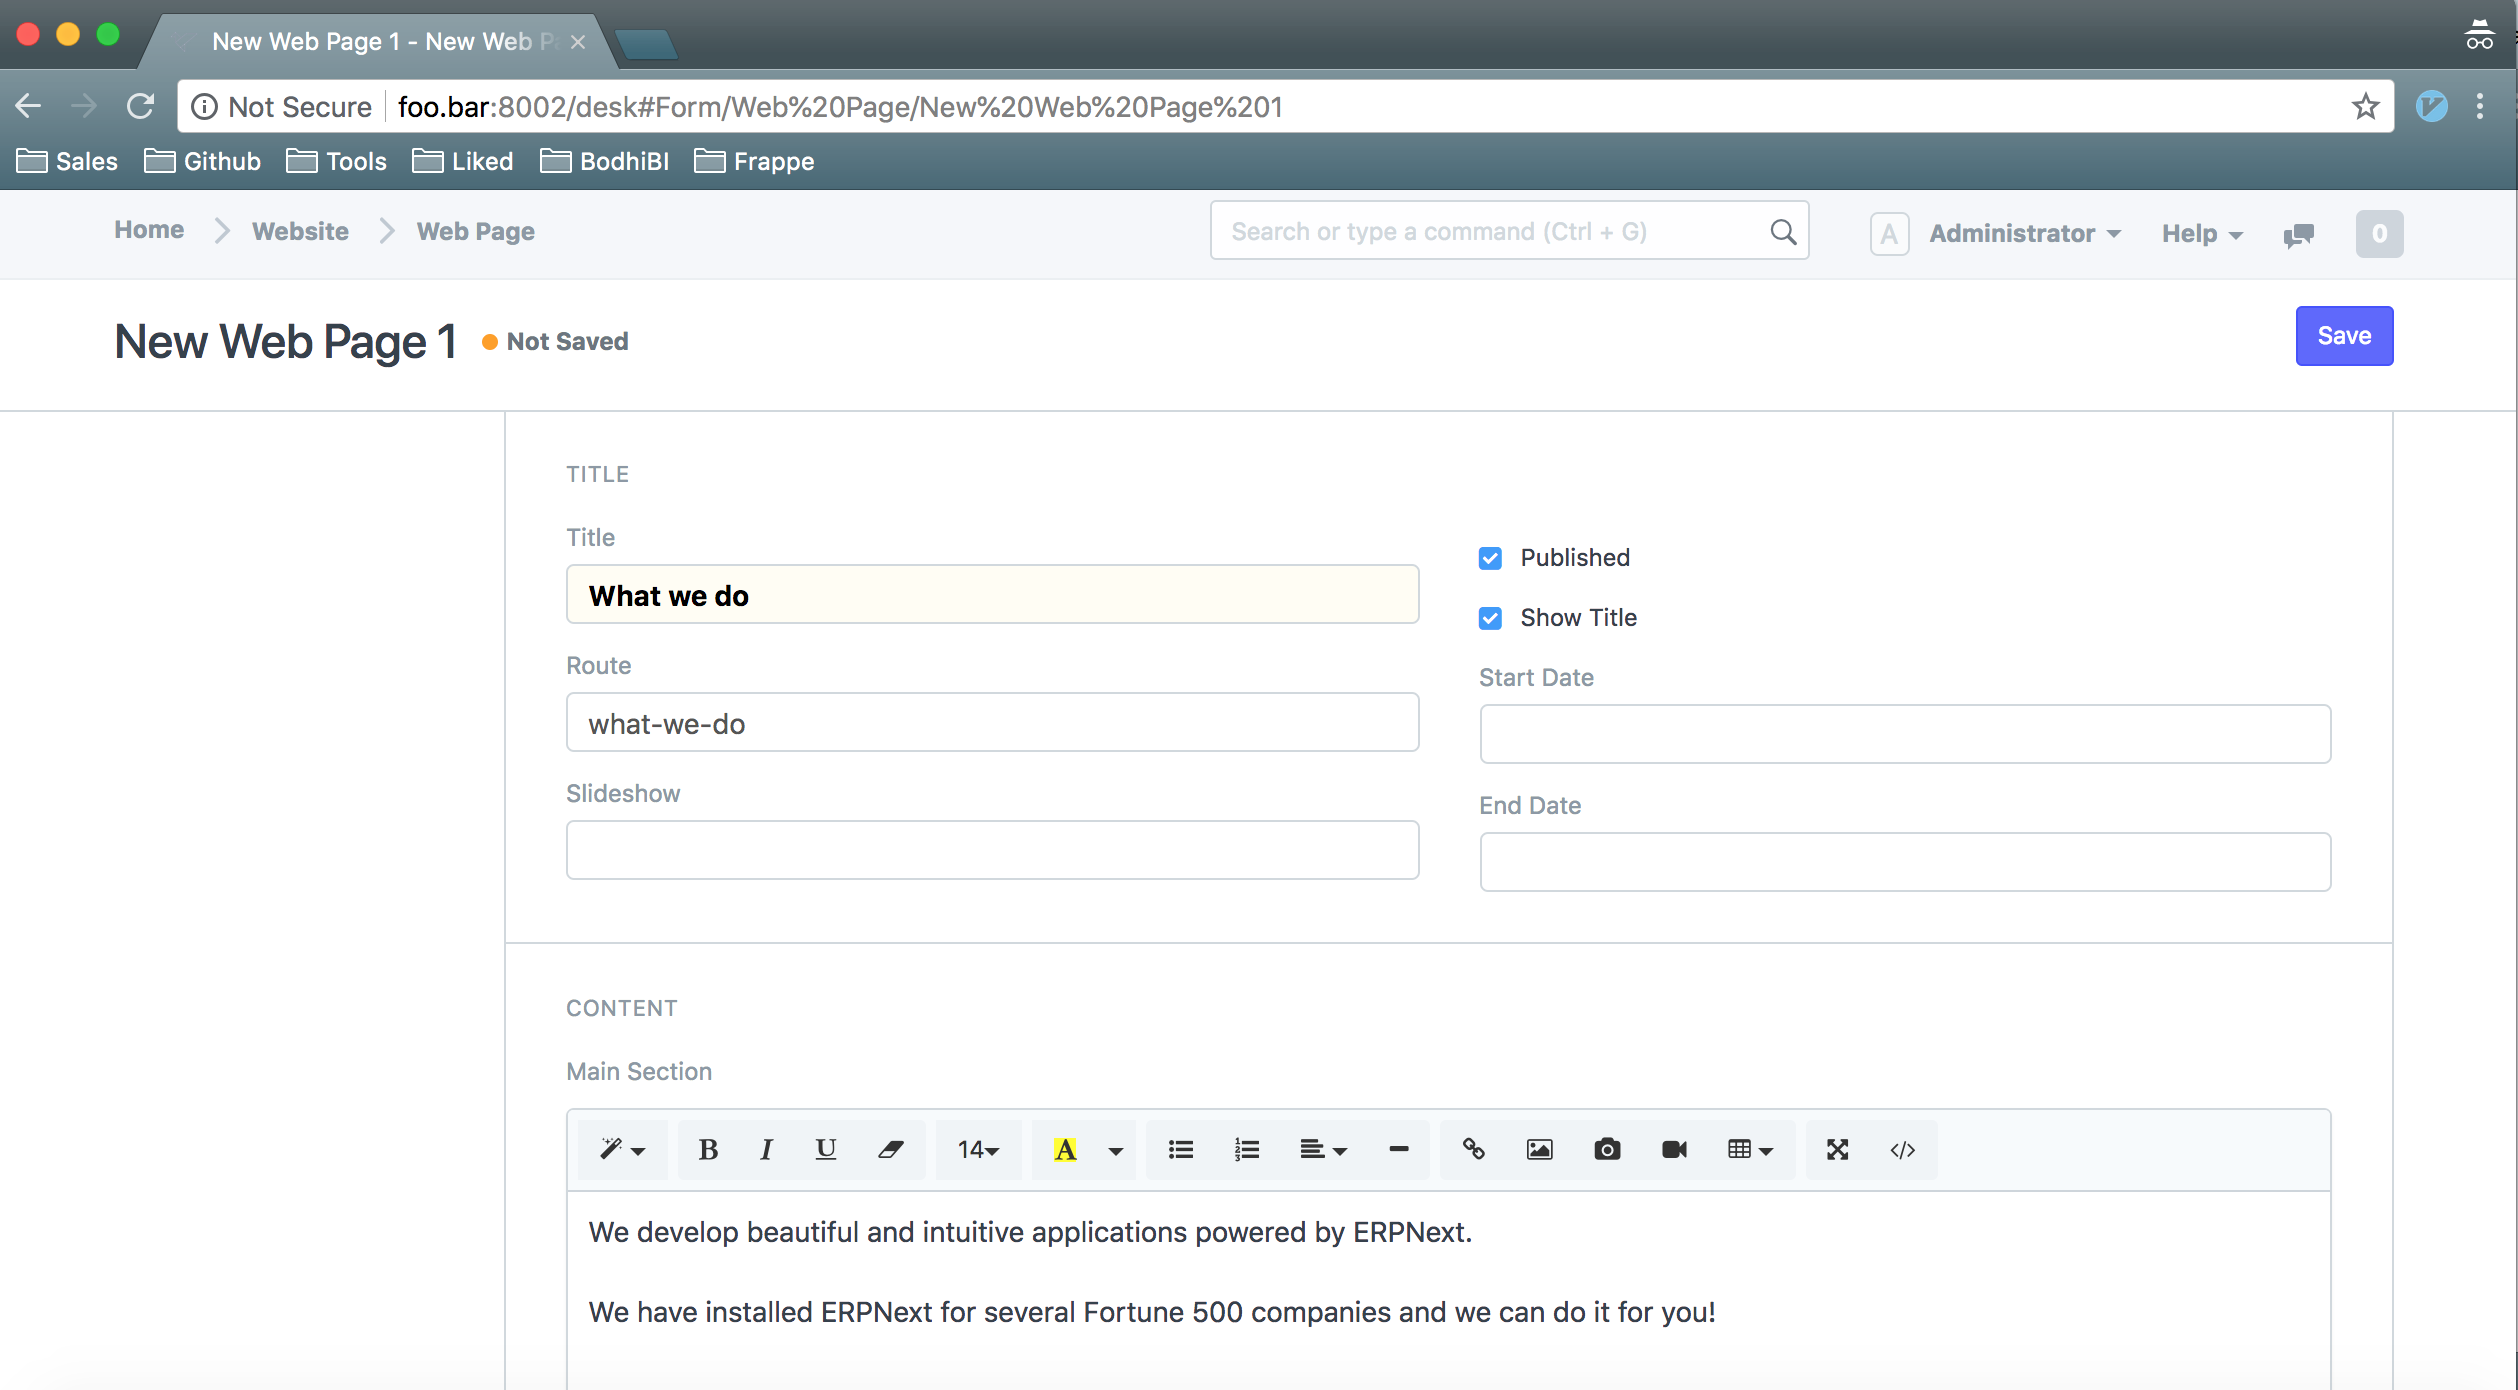
The fields we added are Title, Route and Main Section. We also checked Published.
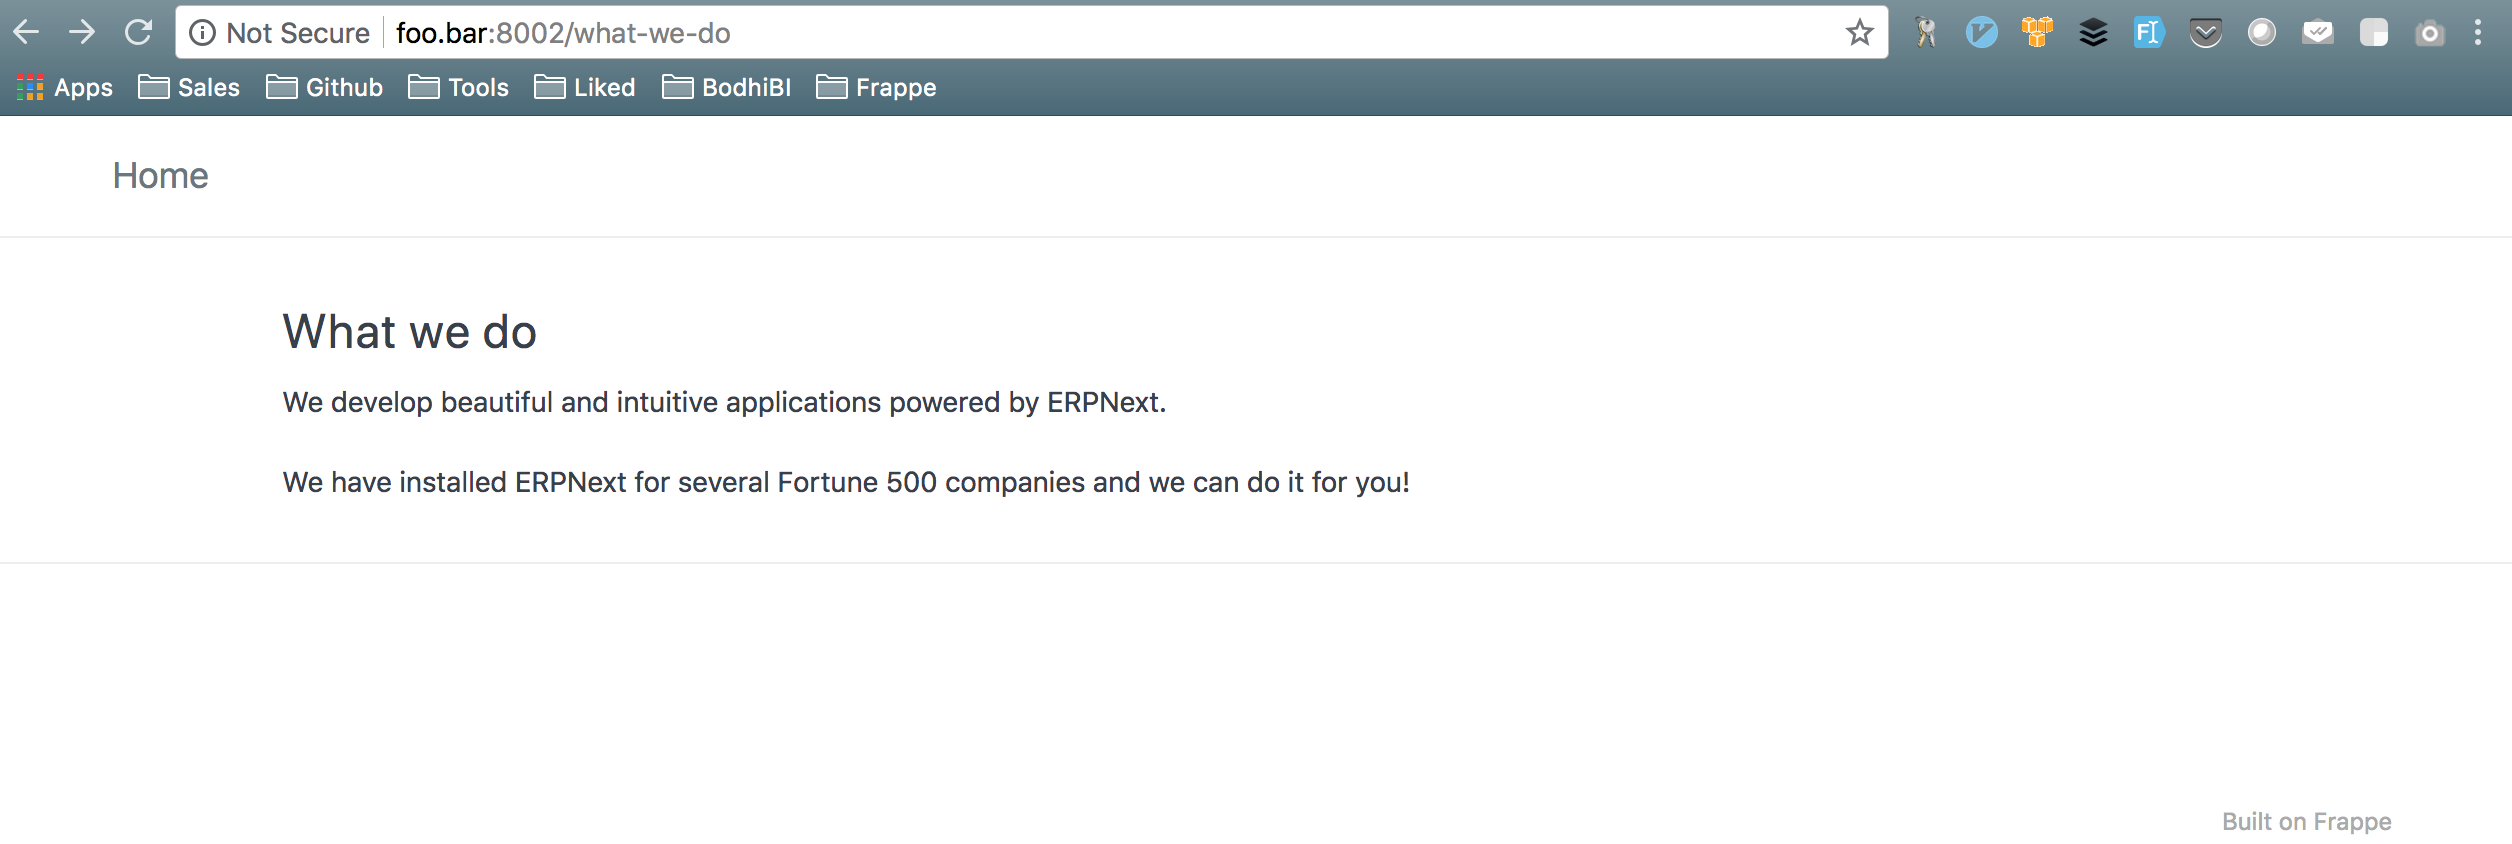
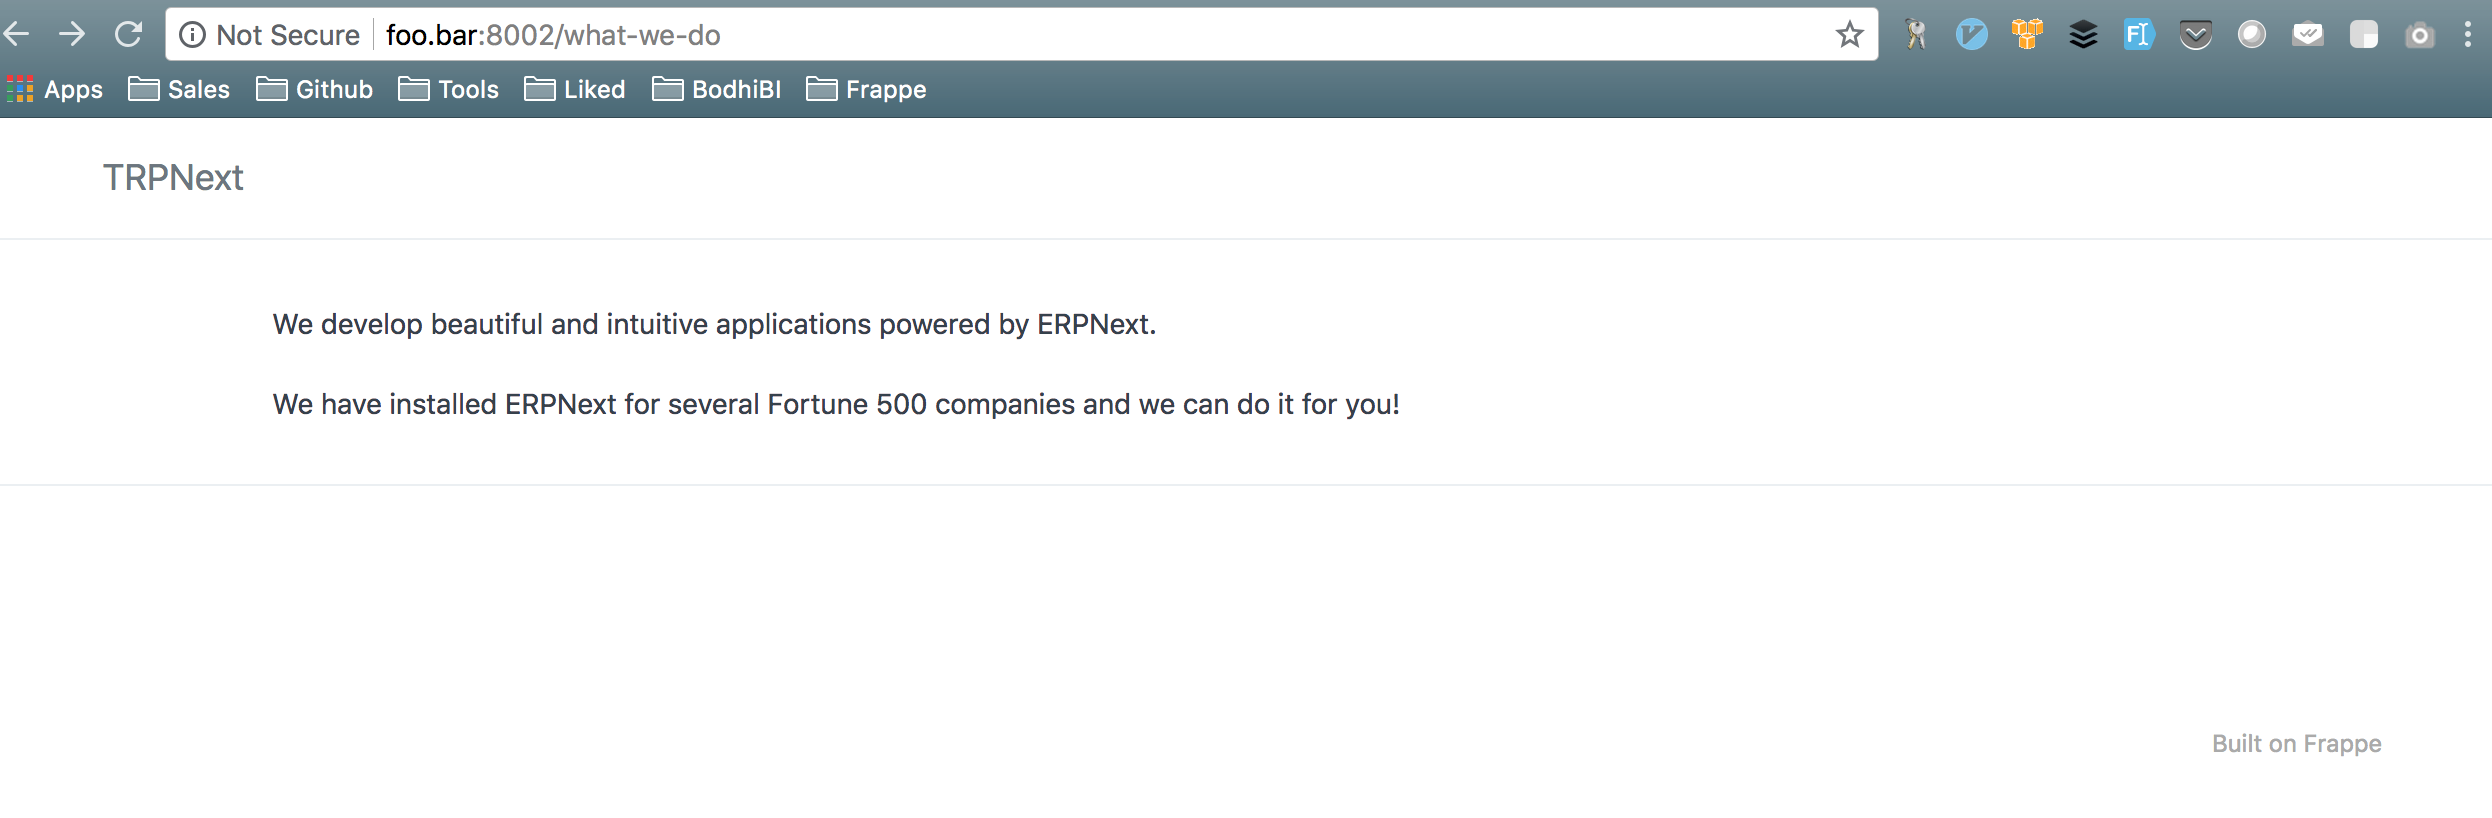
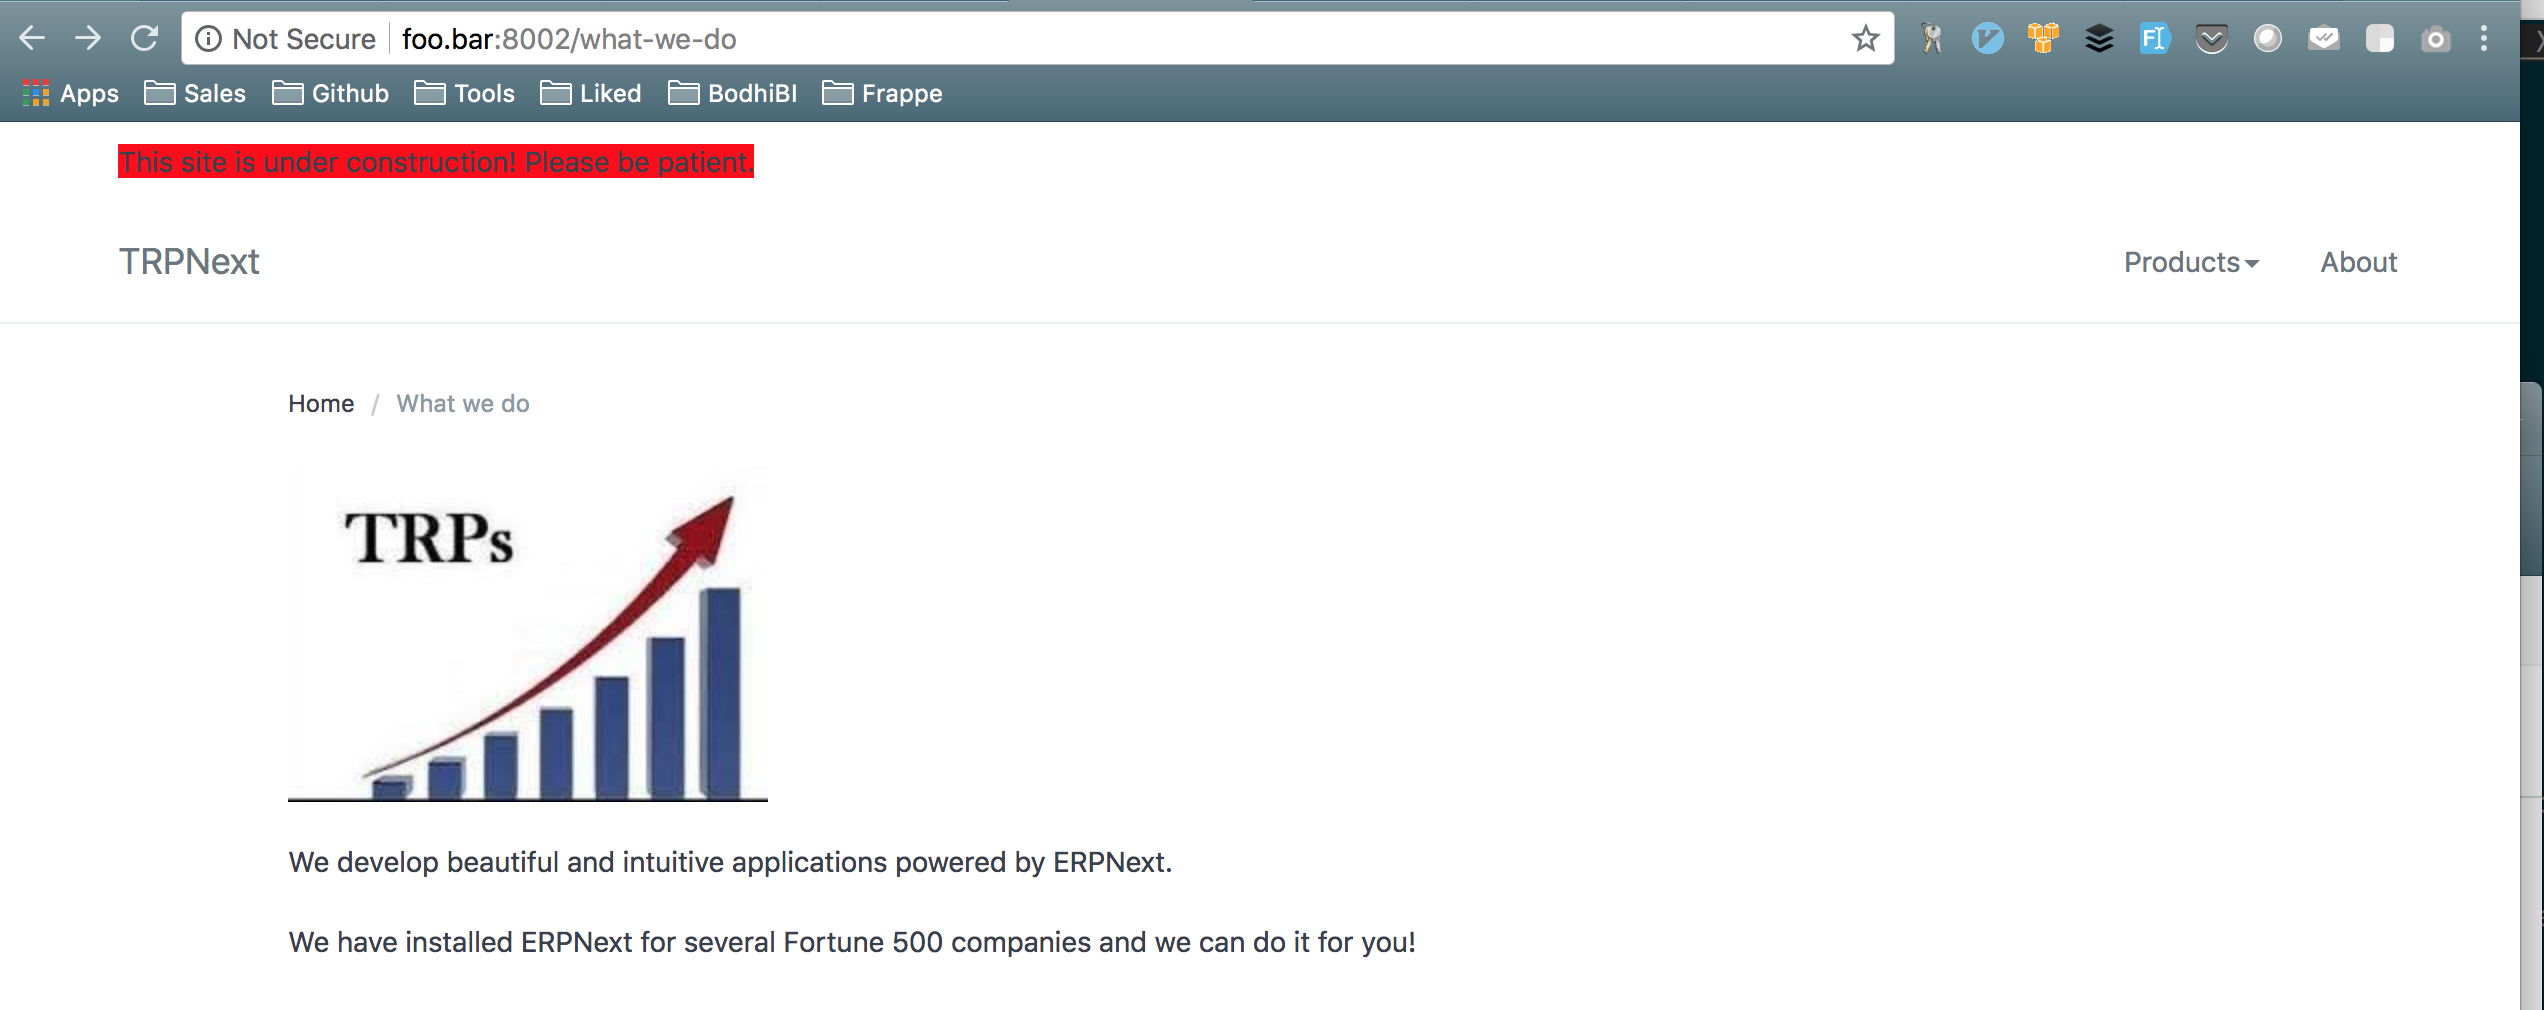
Navigate to /what-we-do and you should be able to see the page.

Hide login
You might want to hide the Login button which shows up on top right.
You can do that by adding a context variable called hide_login.
Add a key website_context with hide_login: true to site_config.json.
site_config.json would look something like:
{
 "db_name": "336d1b3d72e061b9",
 "db_password": "VegaMmPVjPTCszFP",
 ...
 ...
 "website_context": {
  "hide_login": true
 }
}
Clear cache and reload the page, and Login button shouldn’t show up anymore.
You can read about updating context variables in our earlier post.
Currently there isn’t a way to disable the Login button using Website Settings and you need to do it using website_context. Allowing it from Website Settings would be a good idea, and we will work on it.
Change brand
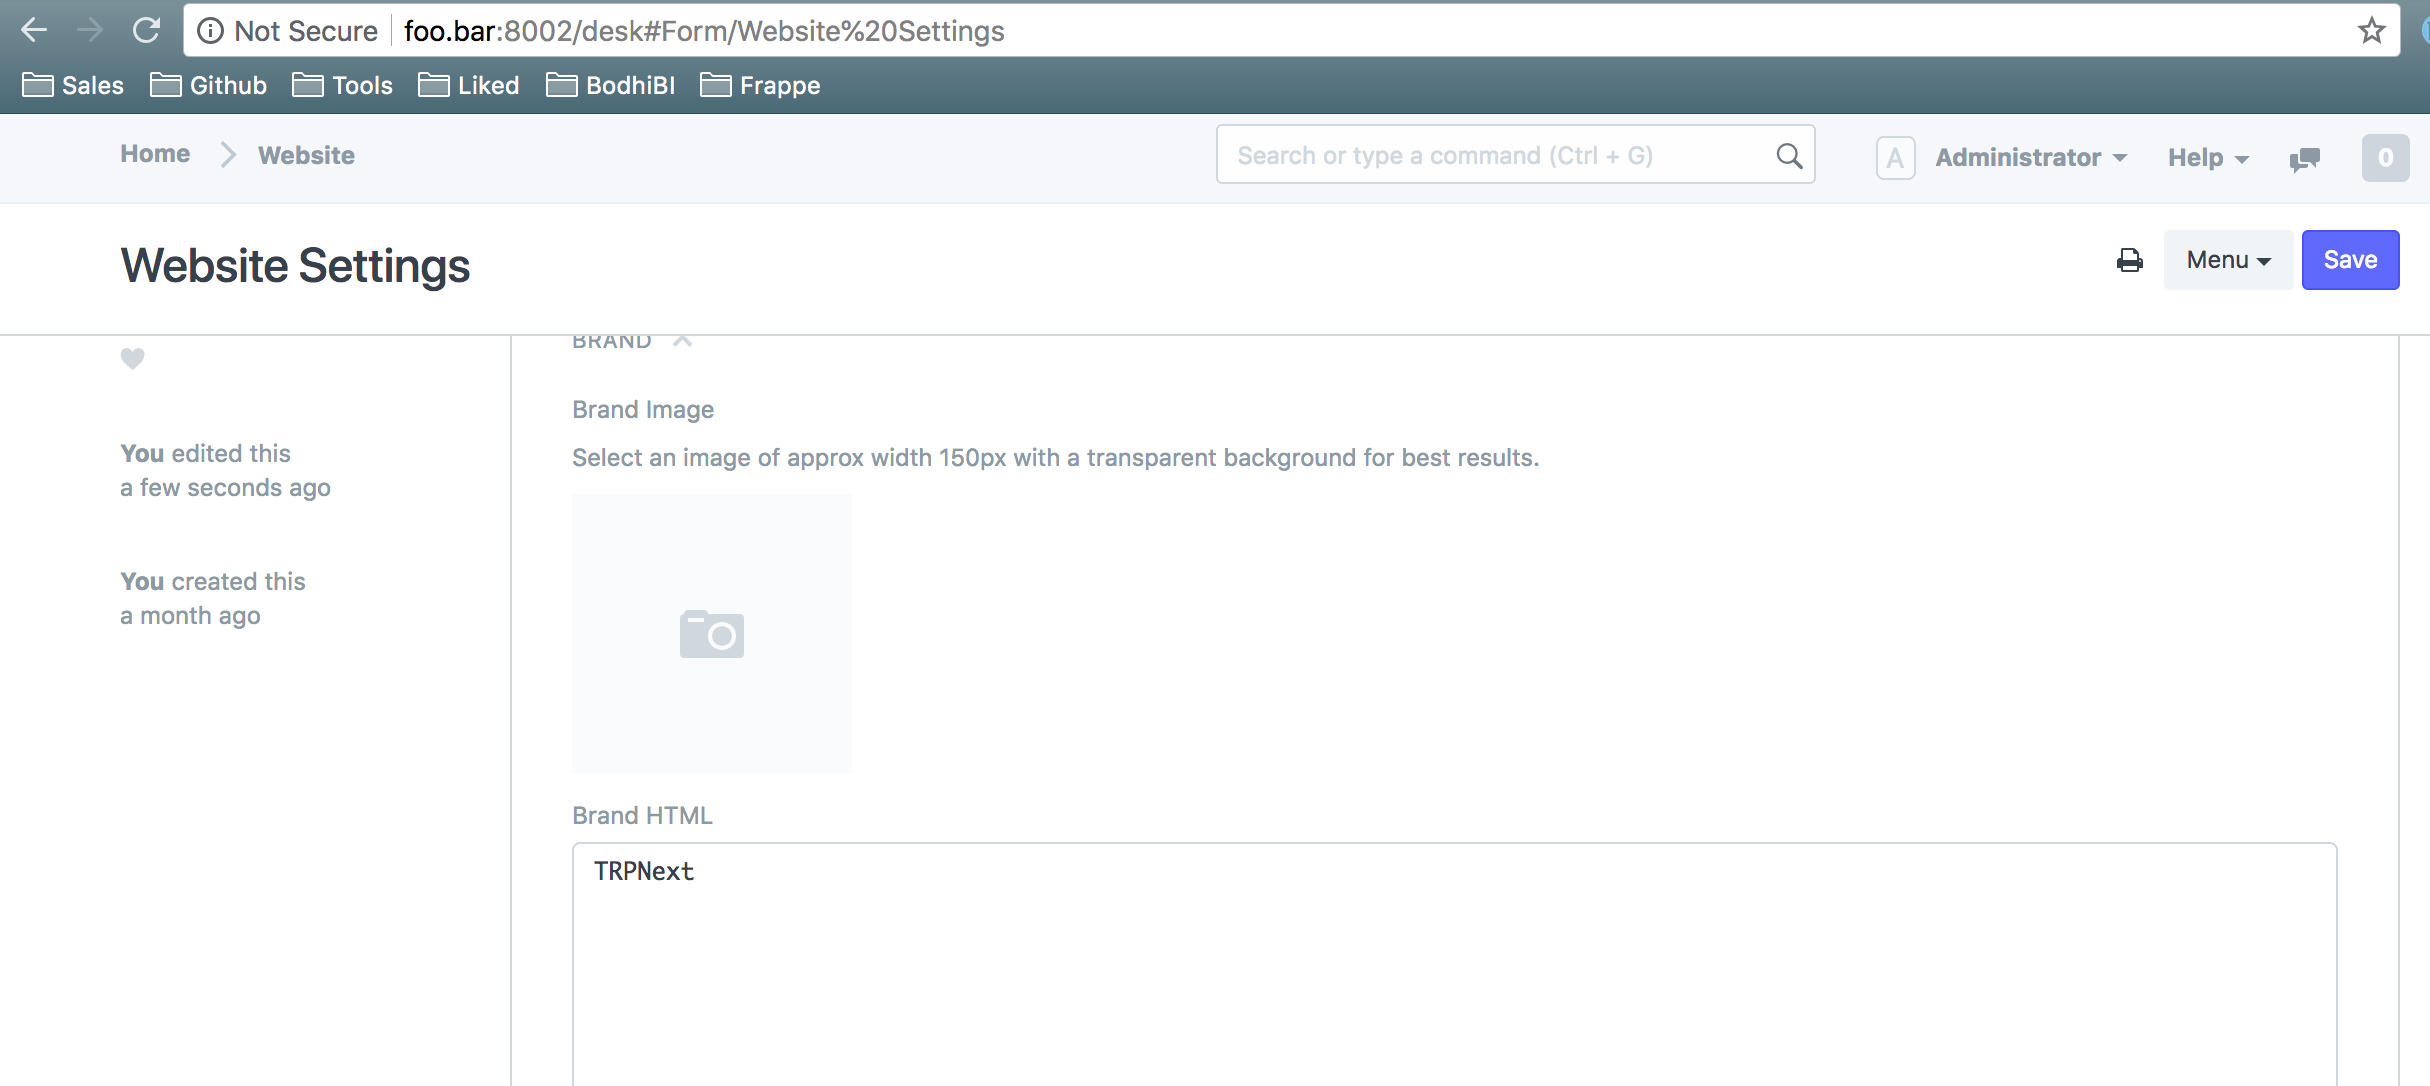
You might want to put your company name in place of Home in top left. You can add that from Tools > Website > Website Settings
Expand Brand under Website Settings and add your company name to Brand HTML.
Clear cache and reload the page, and your company name should show up in top left.
Keep in mind that Website Settings are applied across all pages and wouldn’t only be applied to the What we do page.
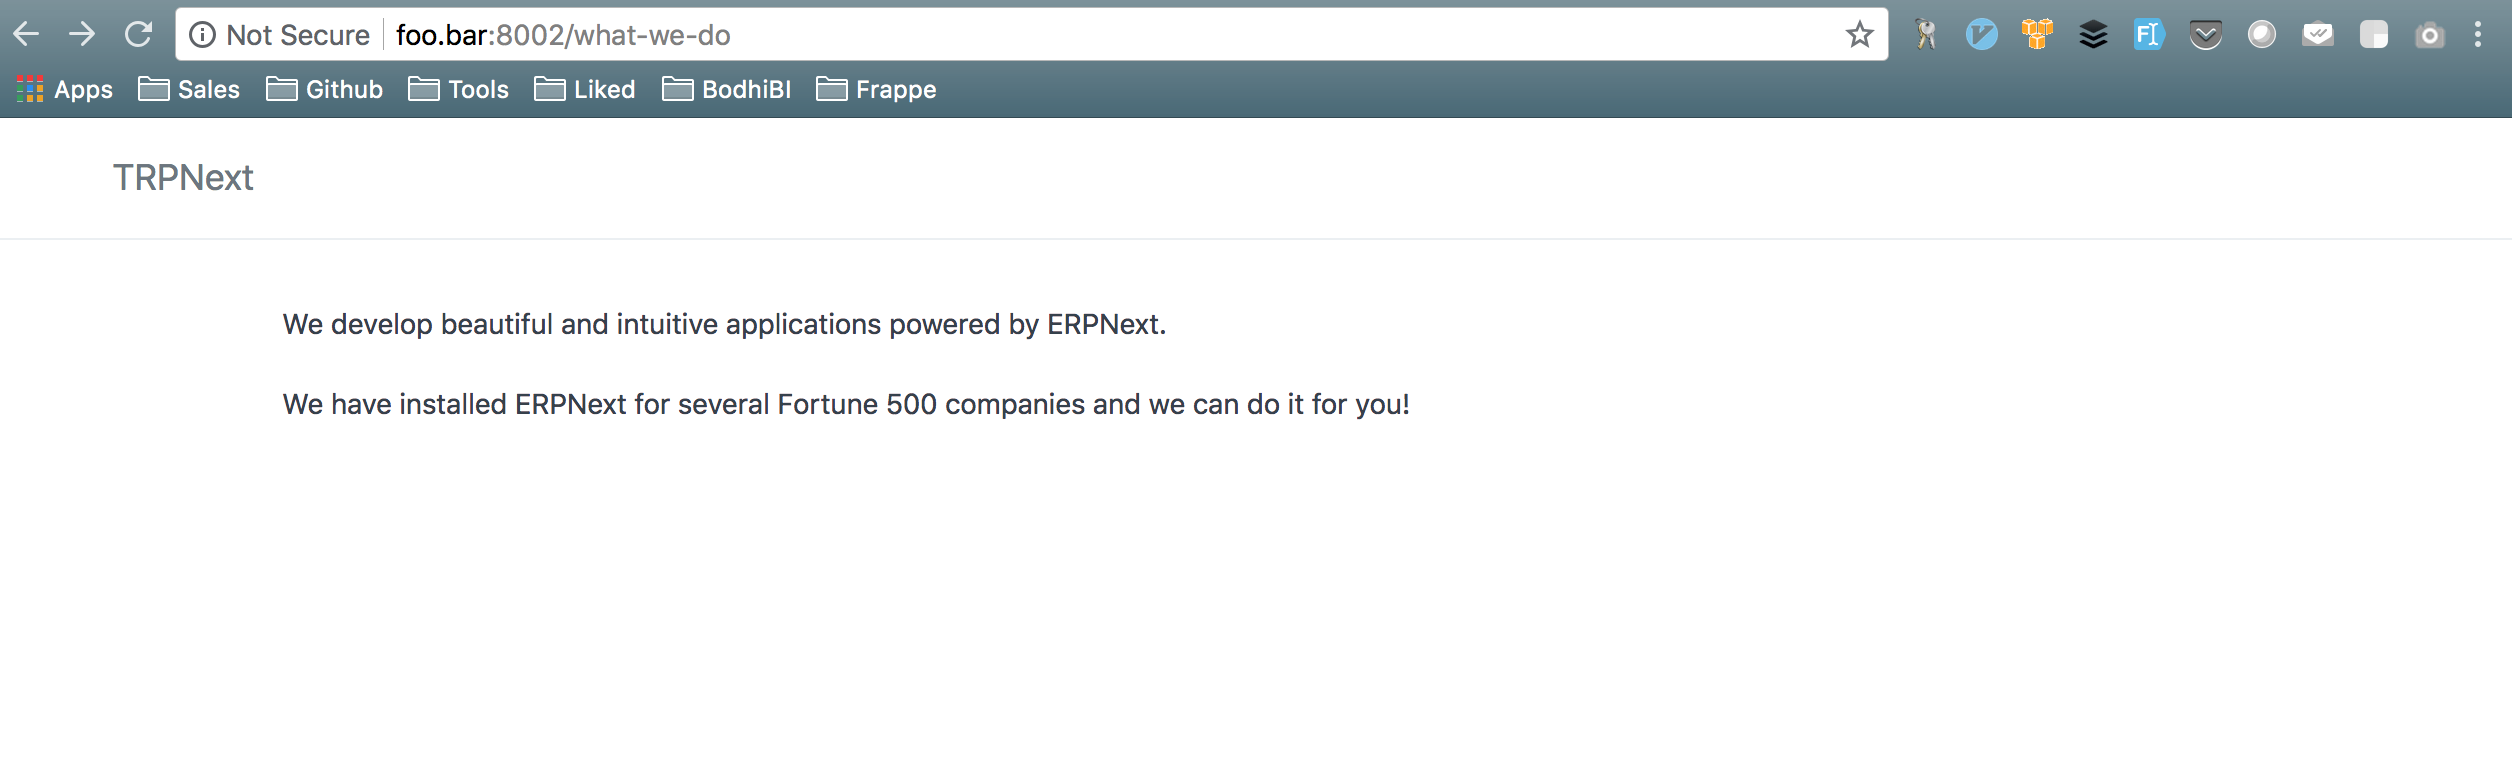
Hide title
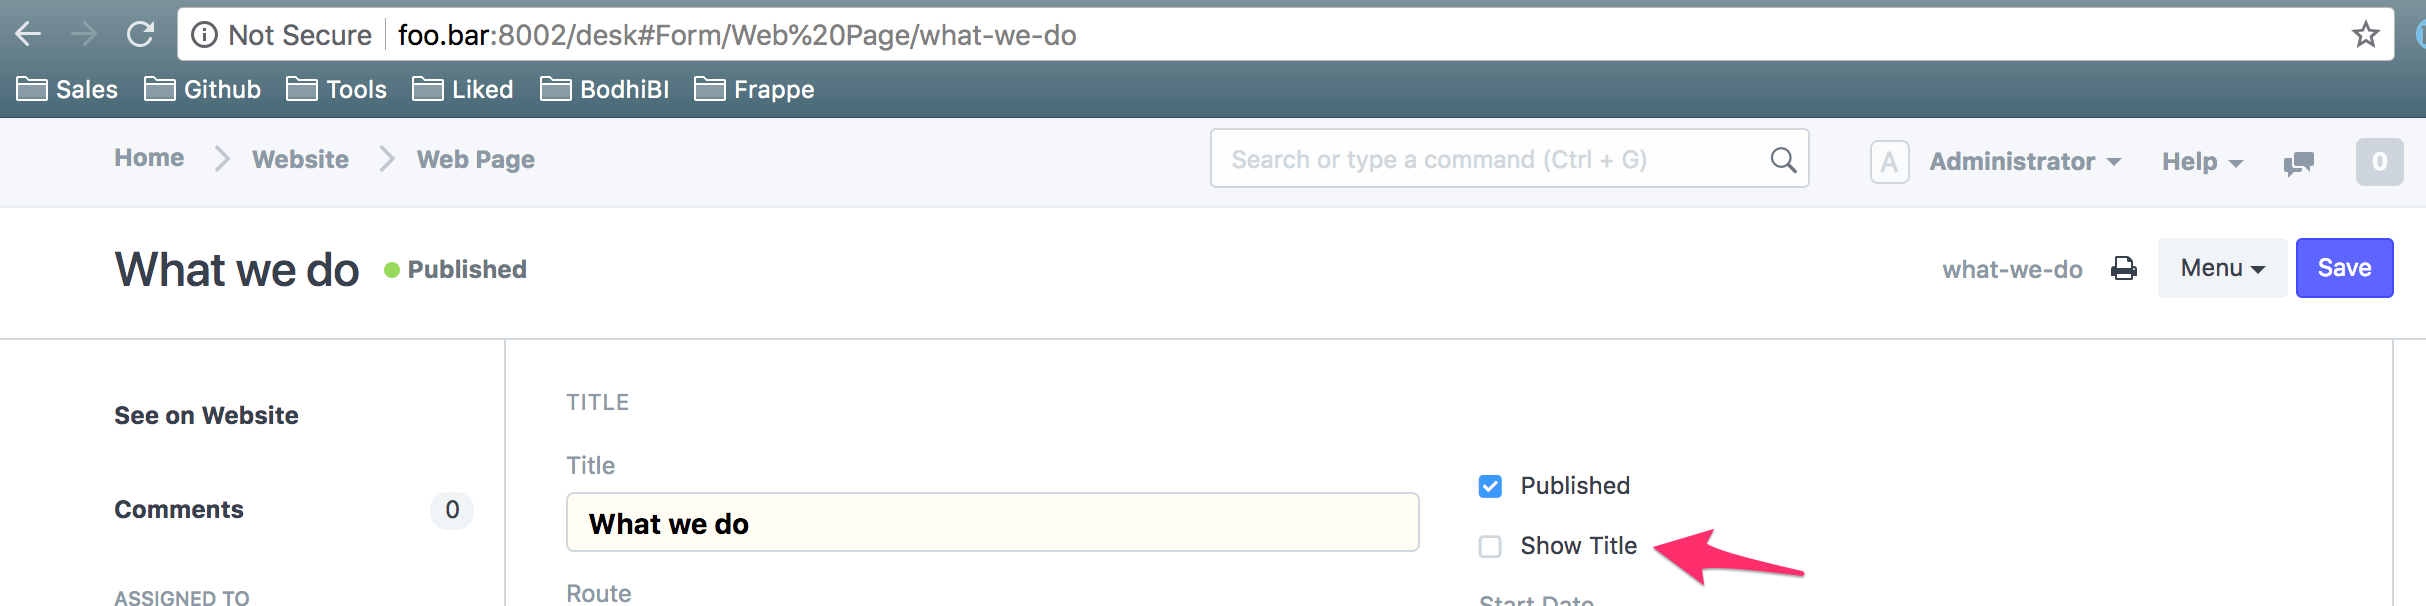
You might not want the title of the page, i.e What we do, to show up in the html body. You can achieve it by unchecking Show Title from the desk.
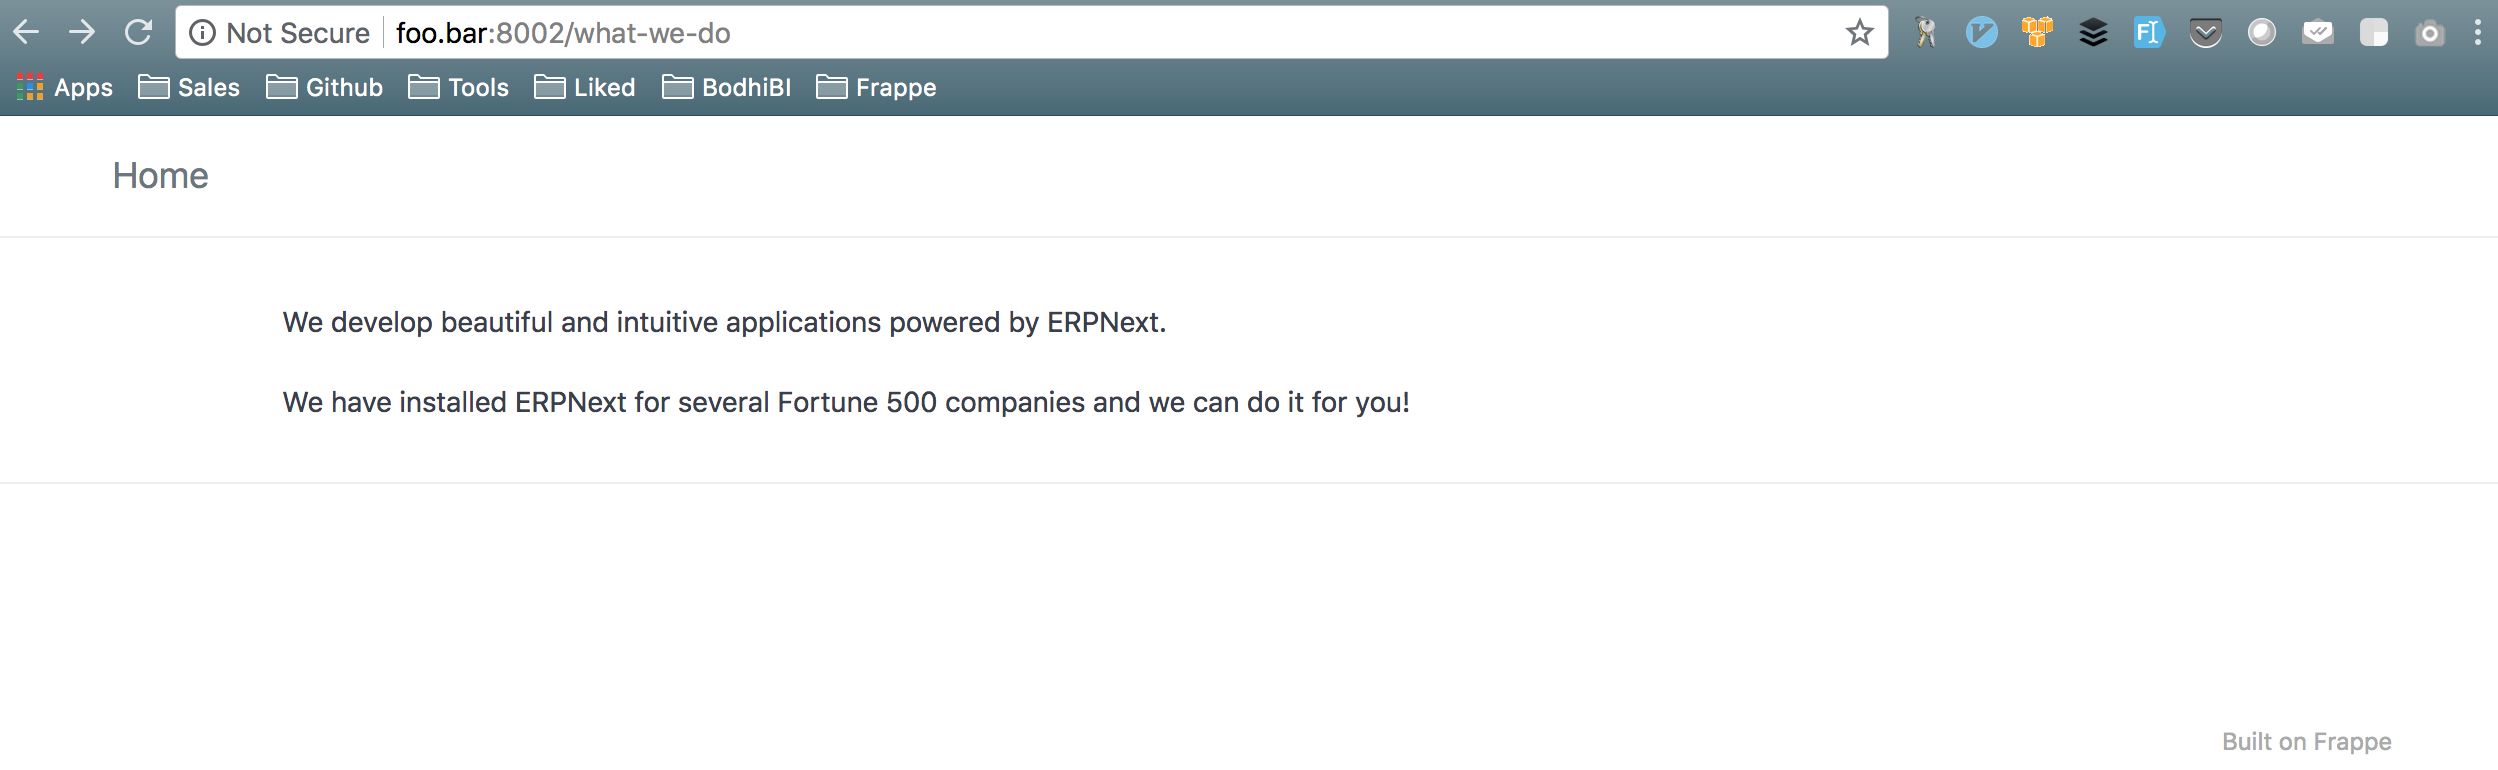
Clear cache and reload the page, and your html content should start from ‘We develop..’.
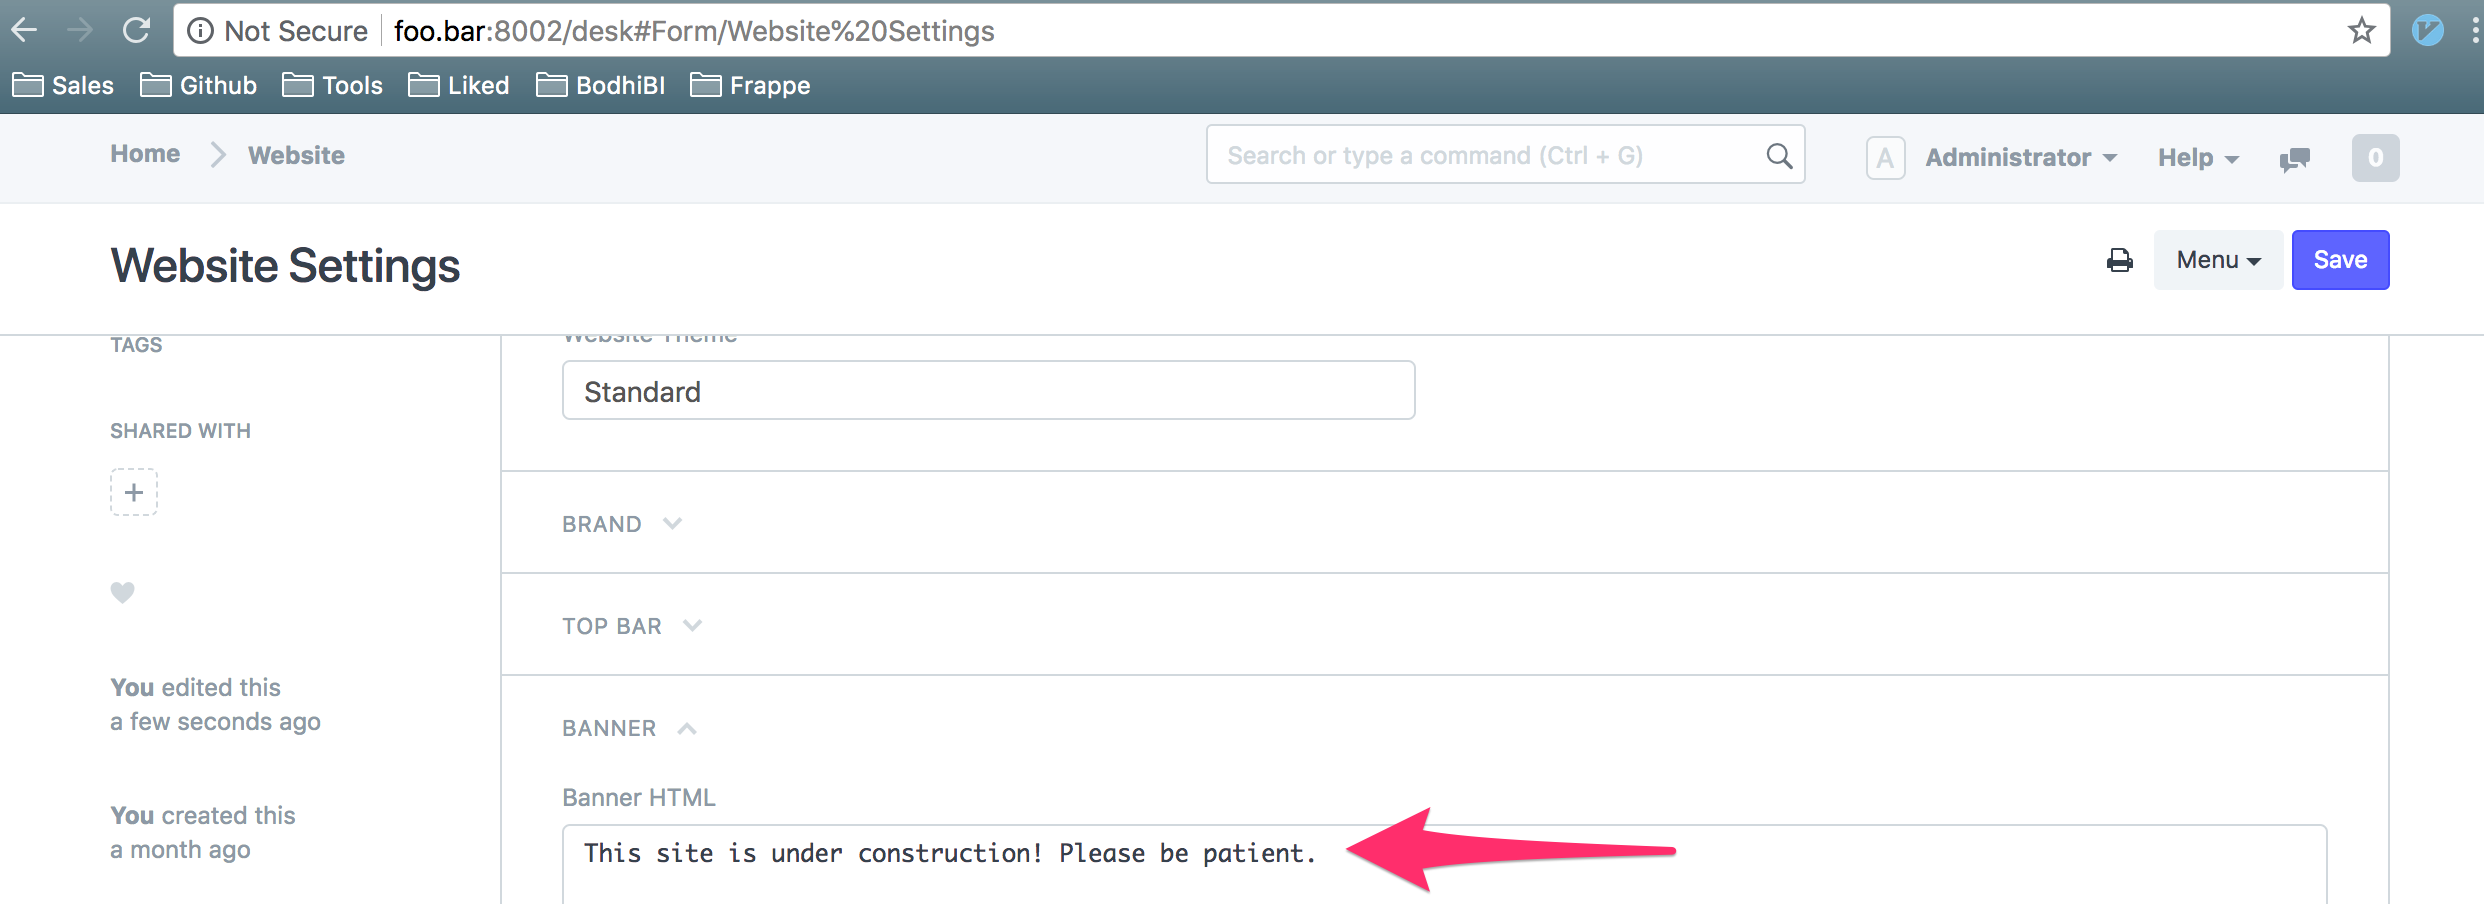
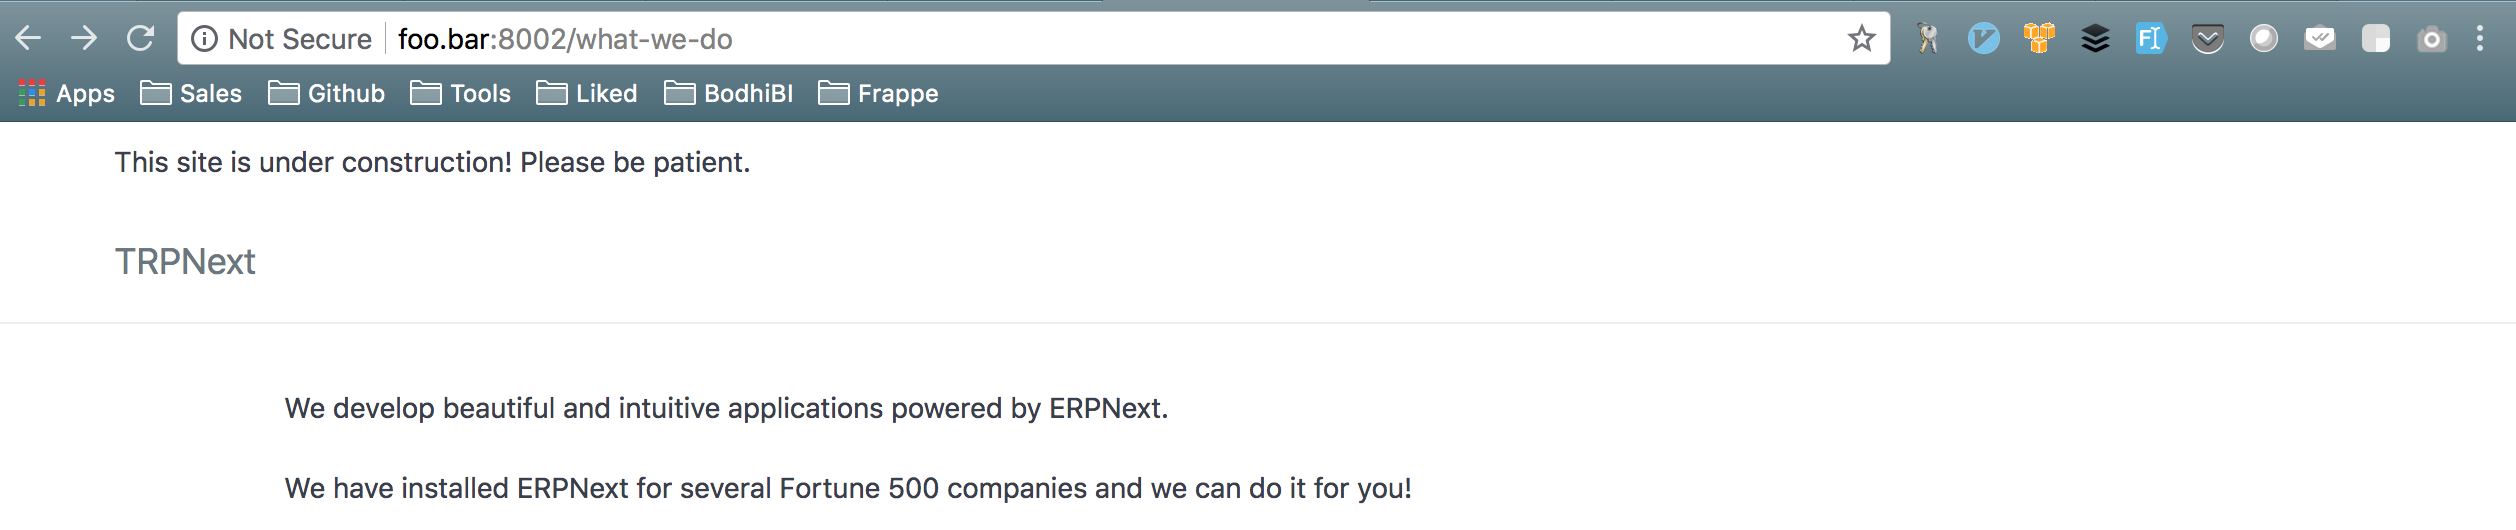
Add banner
A banner appears above the header.
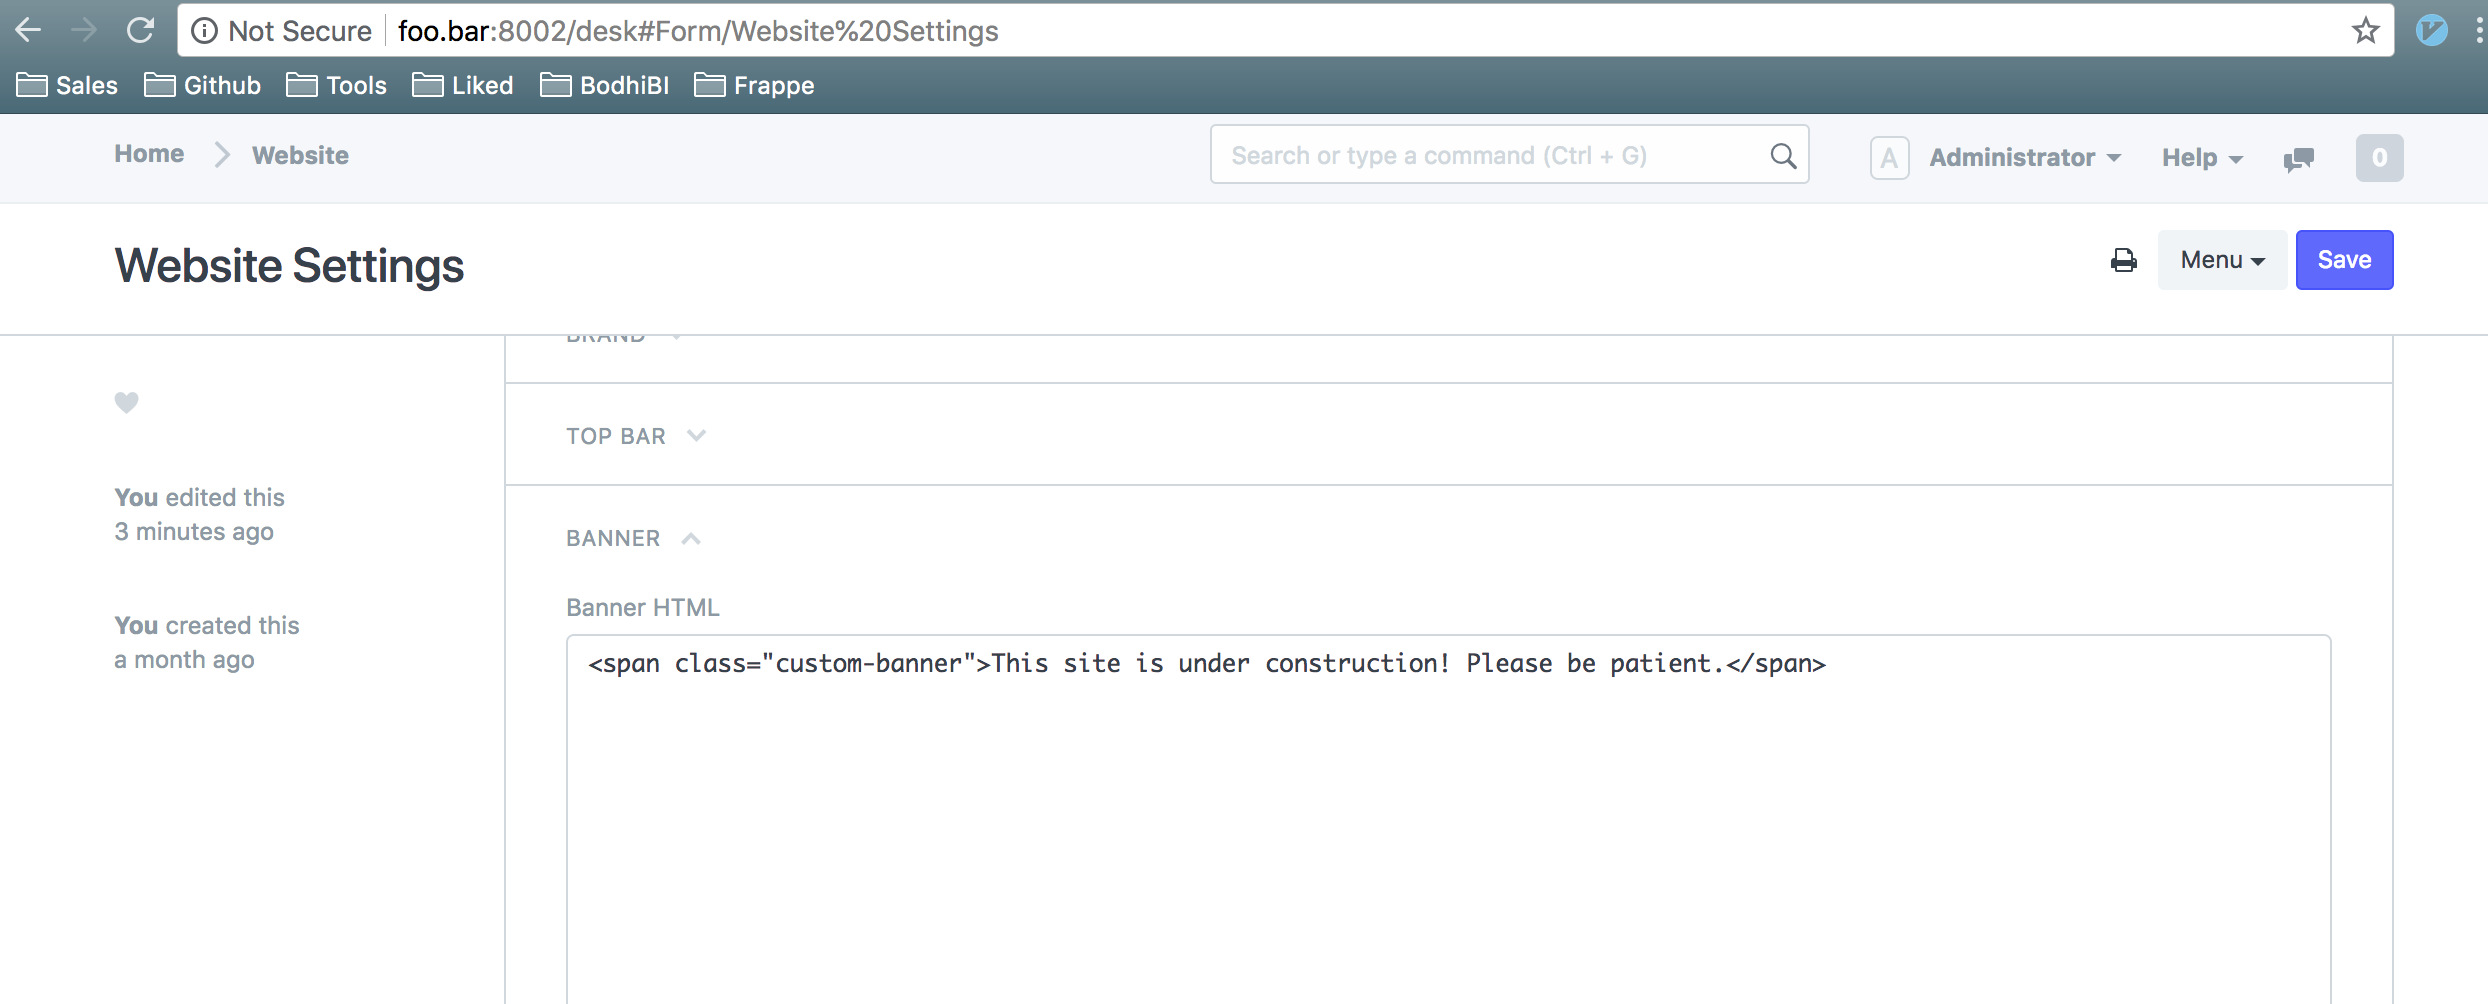
Suppose you want to add a banner to your website, you can do it by editing Banner HTML under Banner.
Clear cache and reload the page, and your banner should show up above the header.
Make banner background red
Frappe allows customising different web pages by applying custom css to each page.
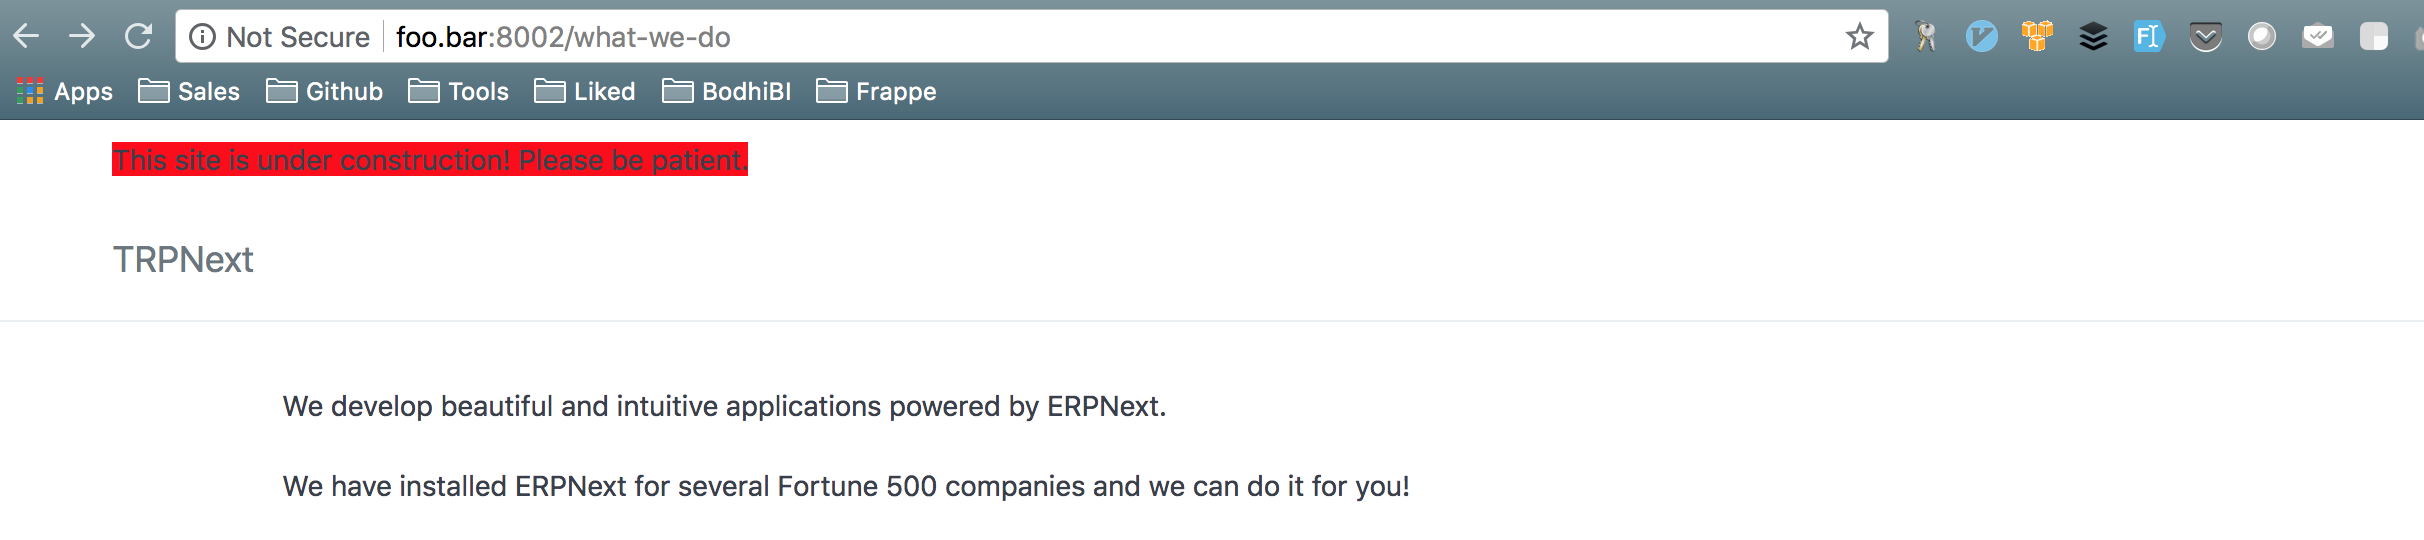
Suppose on this page, we want the banner background to appear red.
Edit Banner HTML and wrap the content in a span element and add a class to span element. Let’s add class custom-banner to the span element.
We want red background for banner on What we do Web Page. Edit this Web Page, expand Style and add CSS. Add the following:
.custom-banner {
  background-color: red;
}
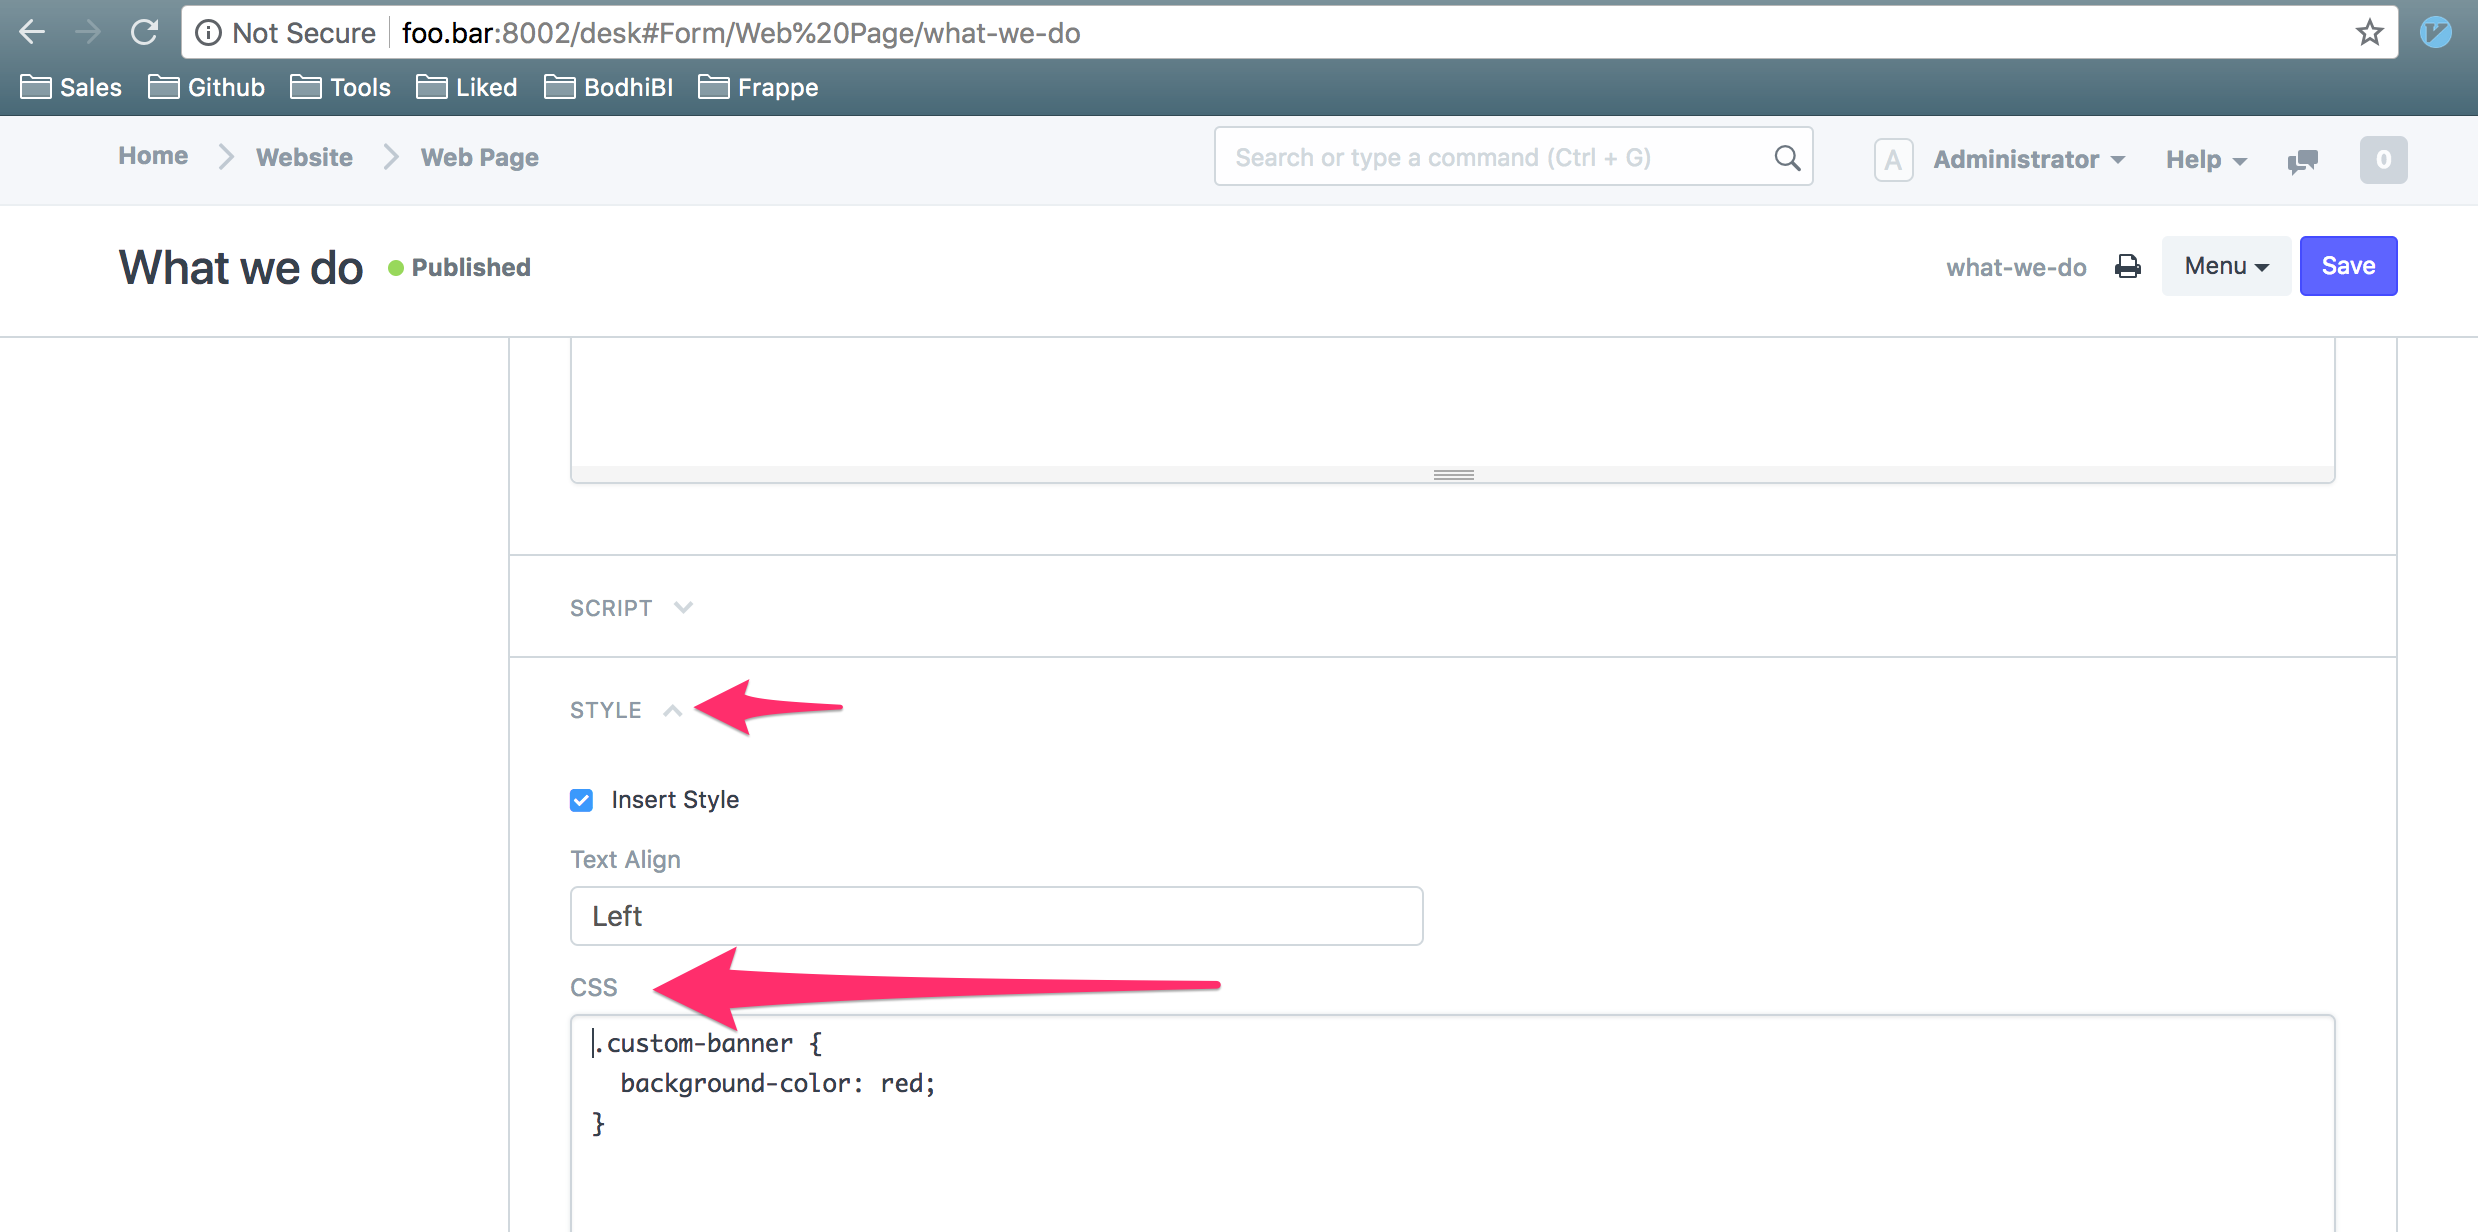
Save the Web Page, clear cache and reload the webpage.
If you want the banner to appear green on some other webpage, you can edit the corresponding Style of that page and add:
.custom-banner {
  background-color: green;
}
“Style > CSS” is a very powerful feature of Frappe using which you can modify the presentation of every webpage and can make every webpage as per your specification.
Add navigation items
Navigation items can be added from Website Settings > TOP BAR.
Add the following entries:

Clear cache and reload the page.
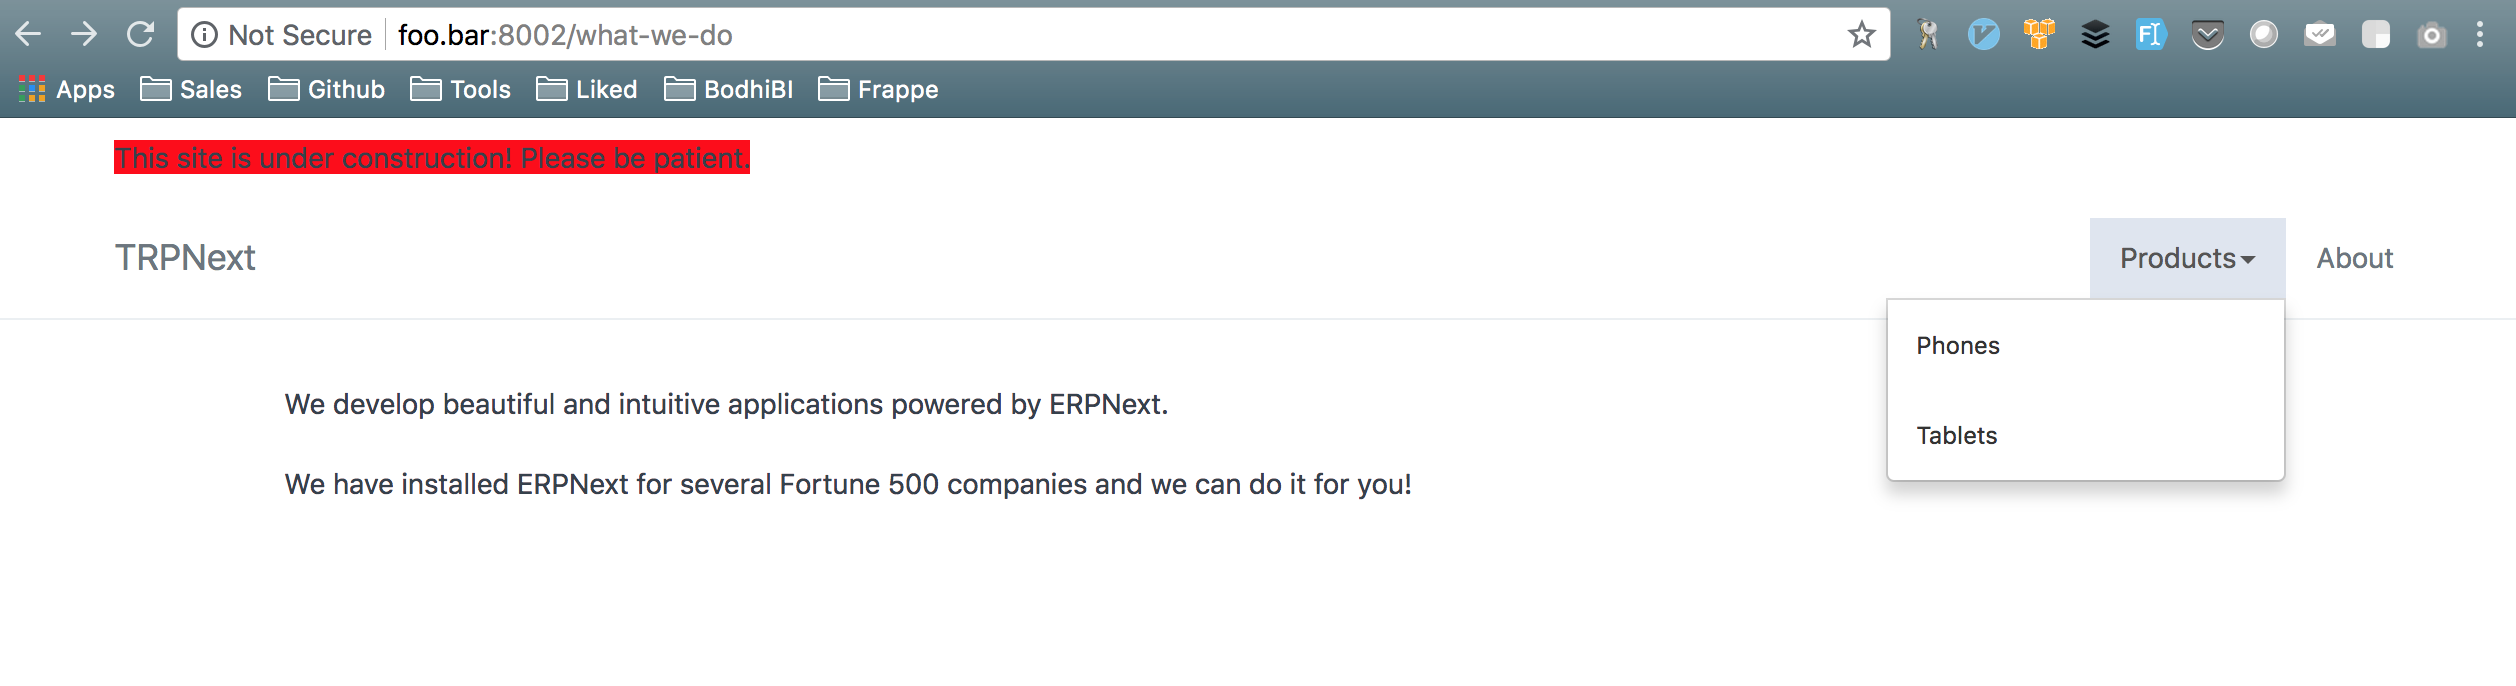
You can add more navigation items from Website Settings > TOP BAR.
Here we wanted to show a nav item called Products and show two sub categories called Phones and Tablets under Products. Because Products is a top level nav item, so we didn’t add a Parent Label for it.
Phones and Tablets should show up under Products, that’s why we added Parent Label for those.
Hide footer
You might not want Built on Frappe to show in the footer, i.e in bottom right.
All web pages added in erpnext/frappe extend from a template called templates/base.html. base.html includes a template called templates/includes/footer/footer_powered.html. This html file has text Built on Frappe because of which all frappe pages have this text in footer.
You can disable it by creating a file called templates/includes/footer/footer_powered.html in any of your custom apps and put no content in this file.
╭─akshar@agiliqs-MacBook-Pro ~/Work/Erpnext/third-bench/apps ‹2.5.0›
╰─$ mkdir meeting/meeting/templates/includes/footer
╭─akshar@agiliqs-MacBook-Pro ~/Work/Erpnext/third-bench/apps ‹2.5.0›
╰─$ touch meeting/meeting/templates/includes/footer/footer_powered.html
Clear cache and reload the page, the footer shouldn’t show anymore.
It would be a good idea to allow hiding footer using Website Settings.
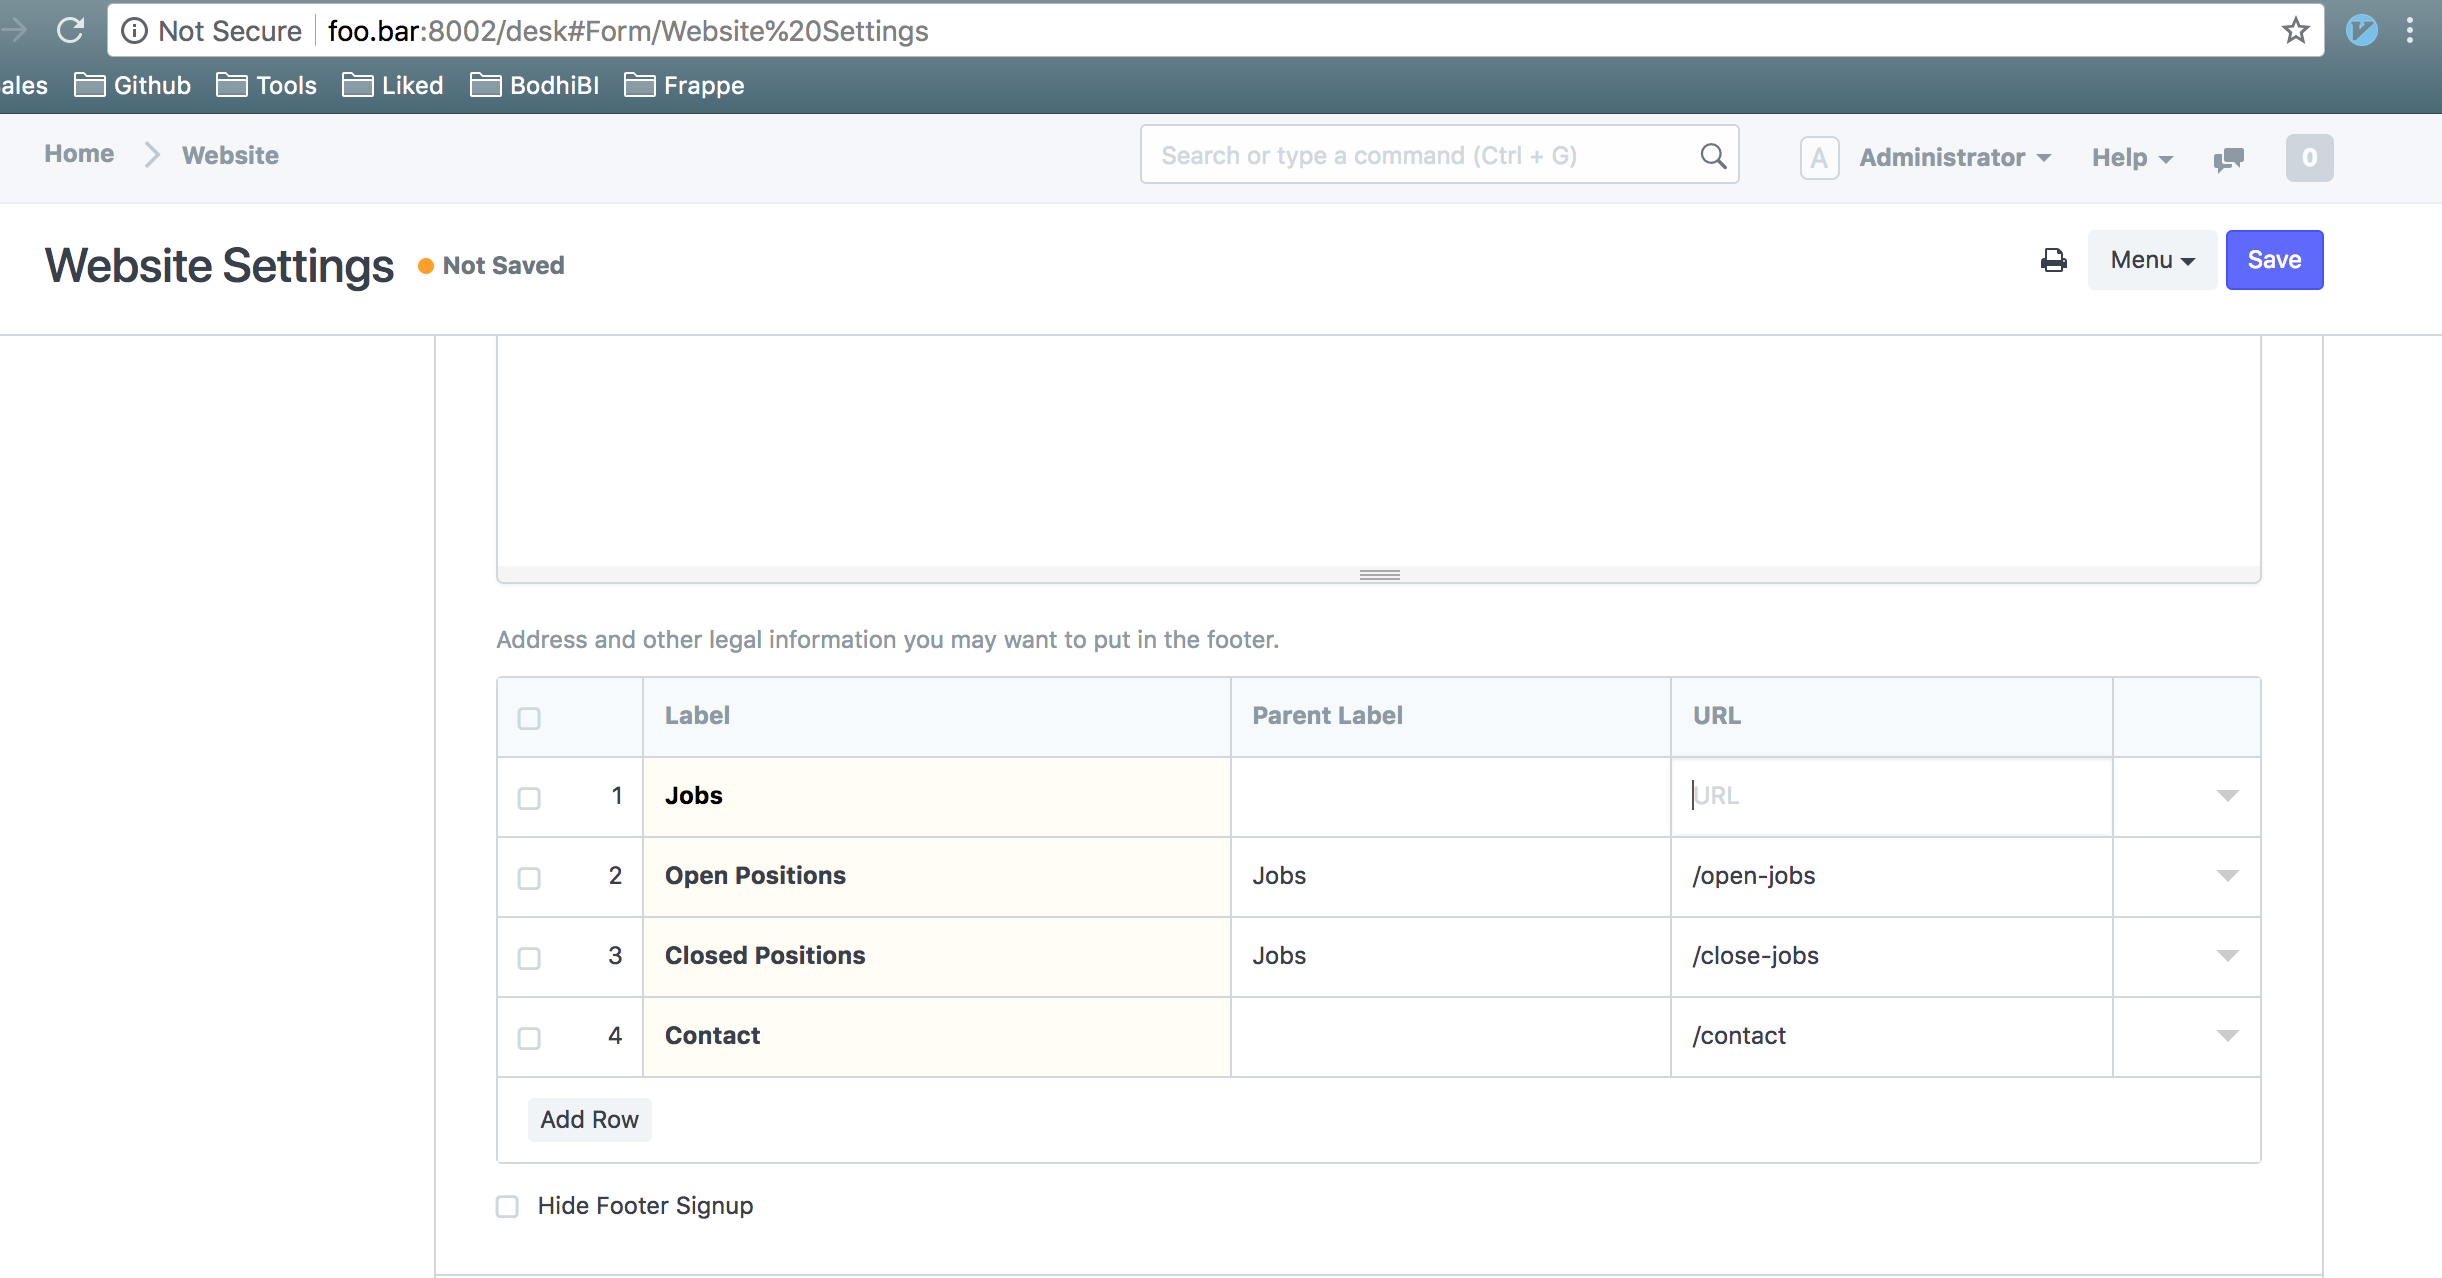
Add footer items
You might want to add footer items like Contact Us, Jobs etc.
You can add footer items from Tools > Website > Website Settings.
Expand FOOTER section and add some information.
Clear cache and reload the page
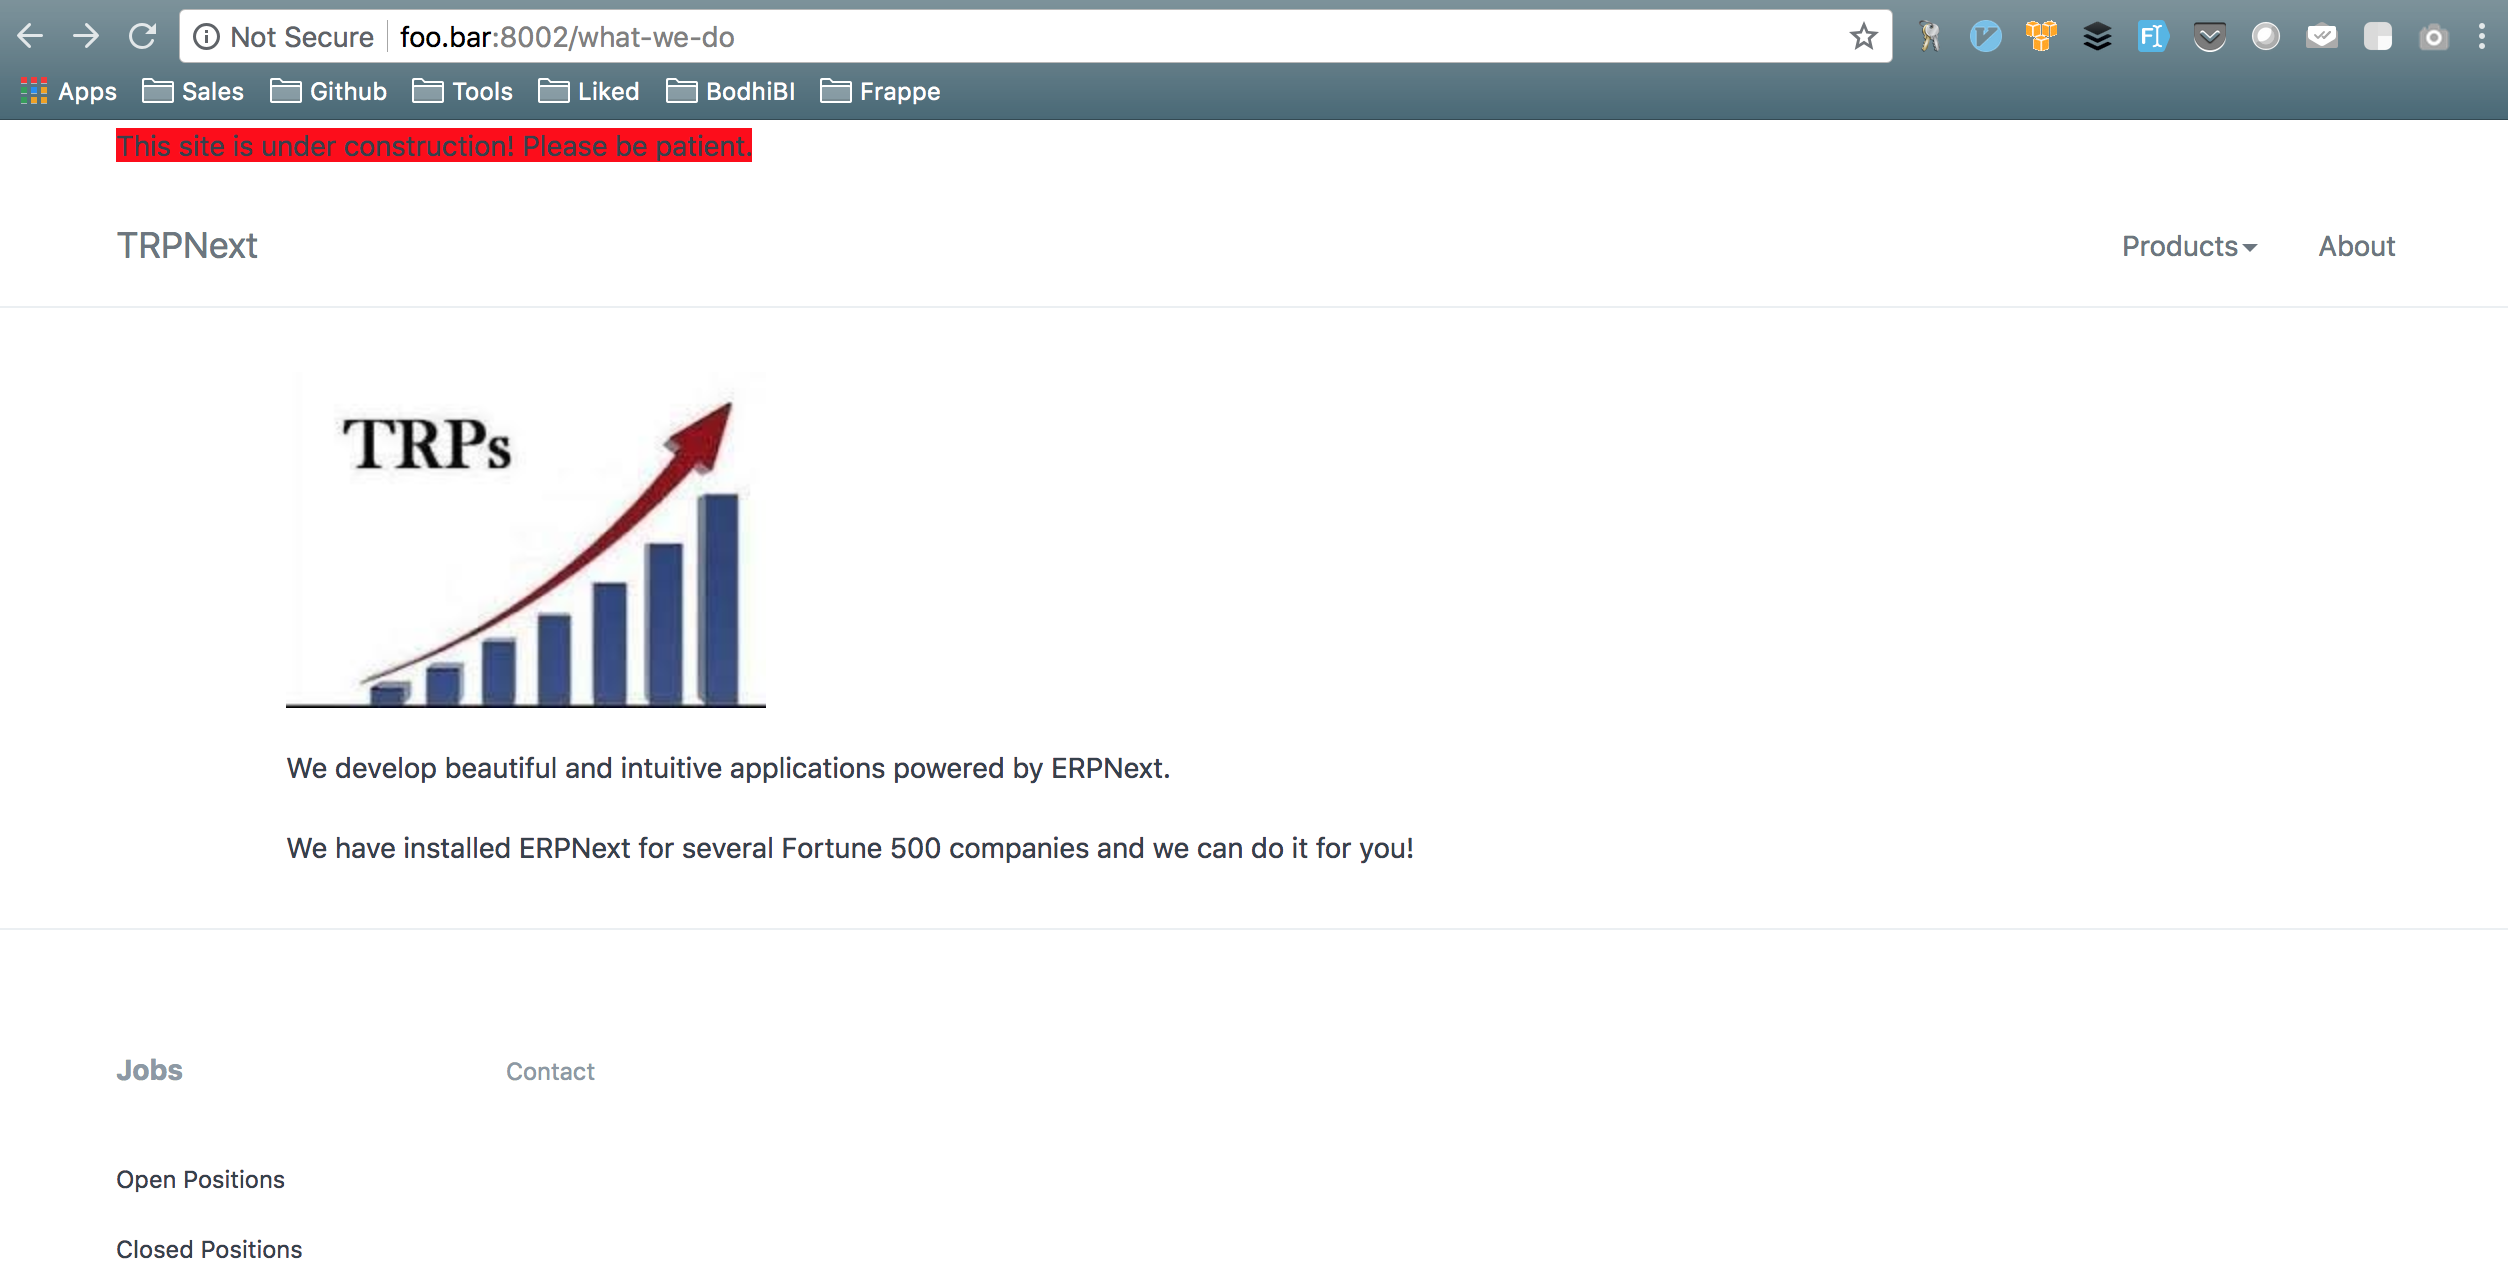
Footer items follow similar patter as top bar described above. We want Open Positions and Closed Positions to show under Jobs, that’s why we added a Parent Label for those.
It’s your responsibility to add web pages for routes /open-jobs and /close-jobs. You can do it similar to how we have added this /what-we-do webpage.
Adding breadcrumbs
You can add breadcrumbs by expanding HEADER AND DESCRIPTION and adding value in Breadcrumbs.
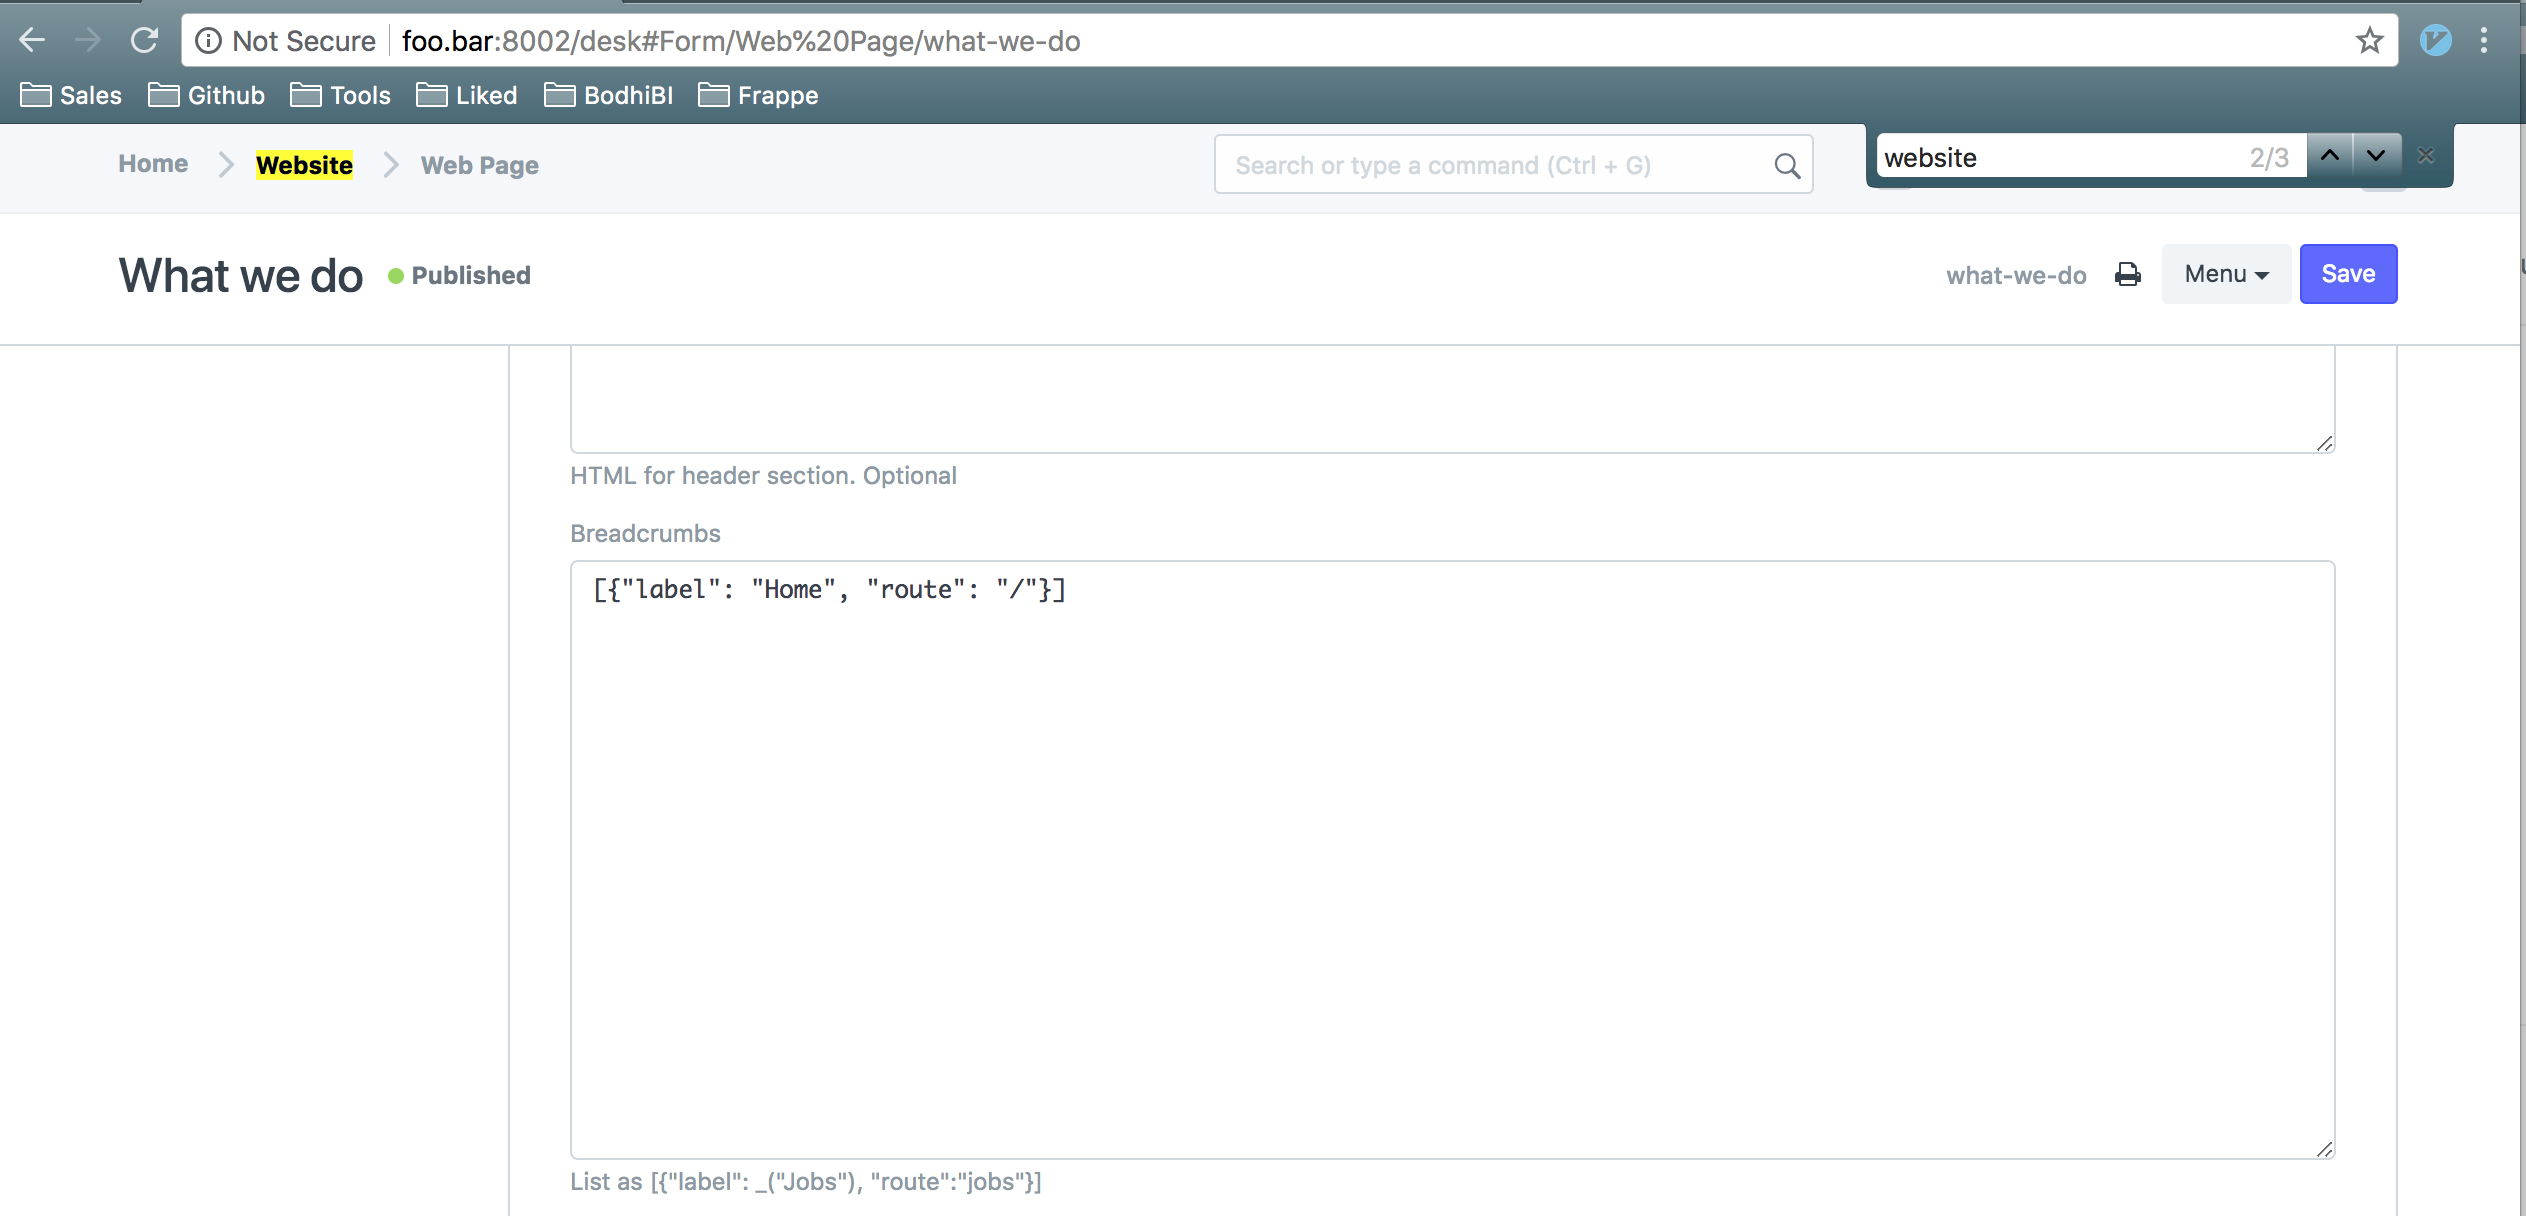
Clear cache and reload the page
If you want something else to add between Home and What we do, let’s say “About”, then modify the Breadcrumbs to look like
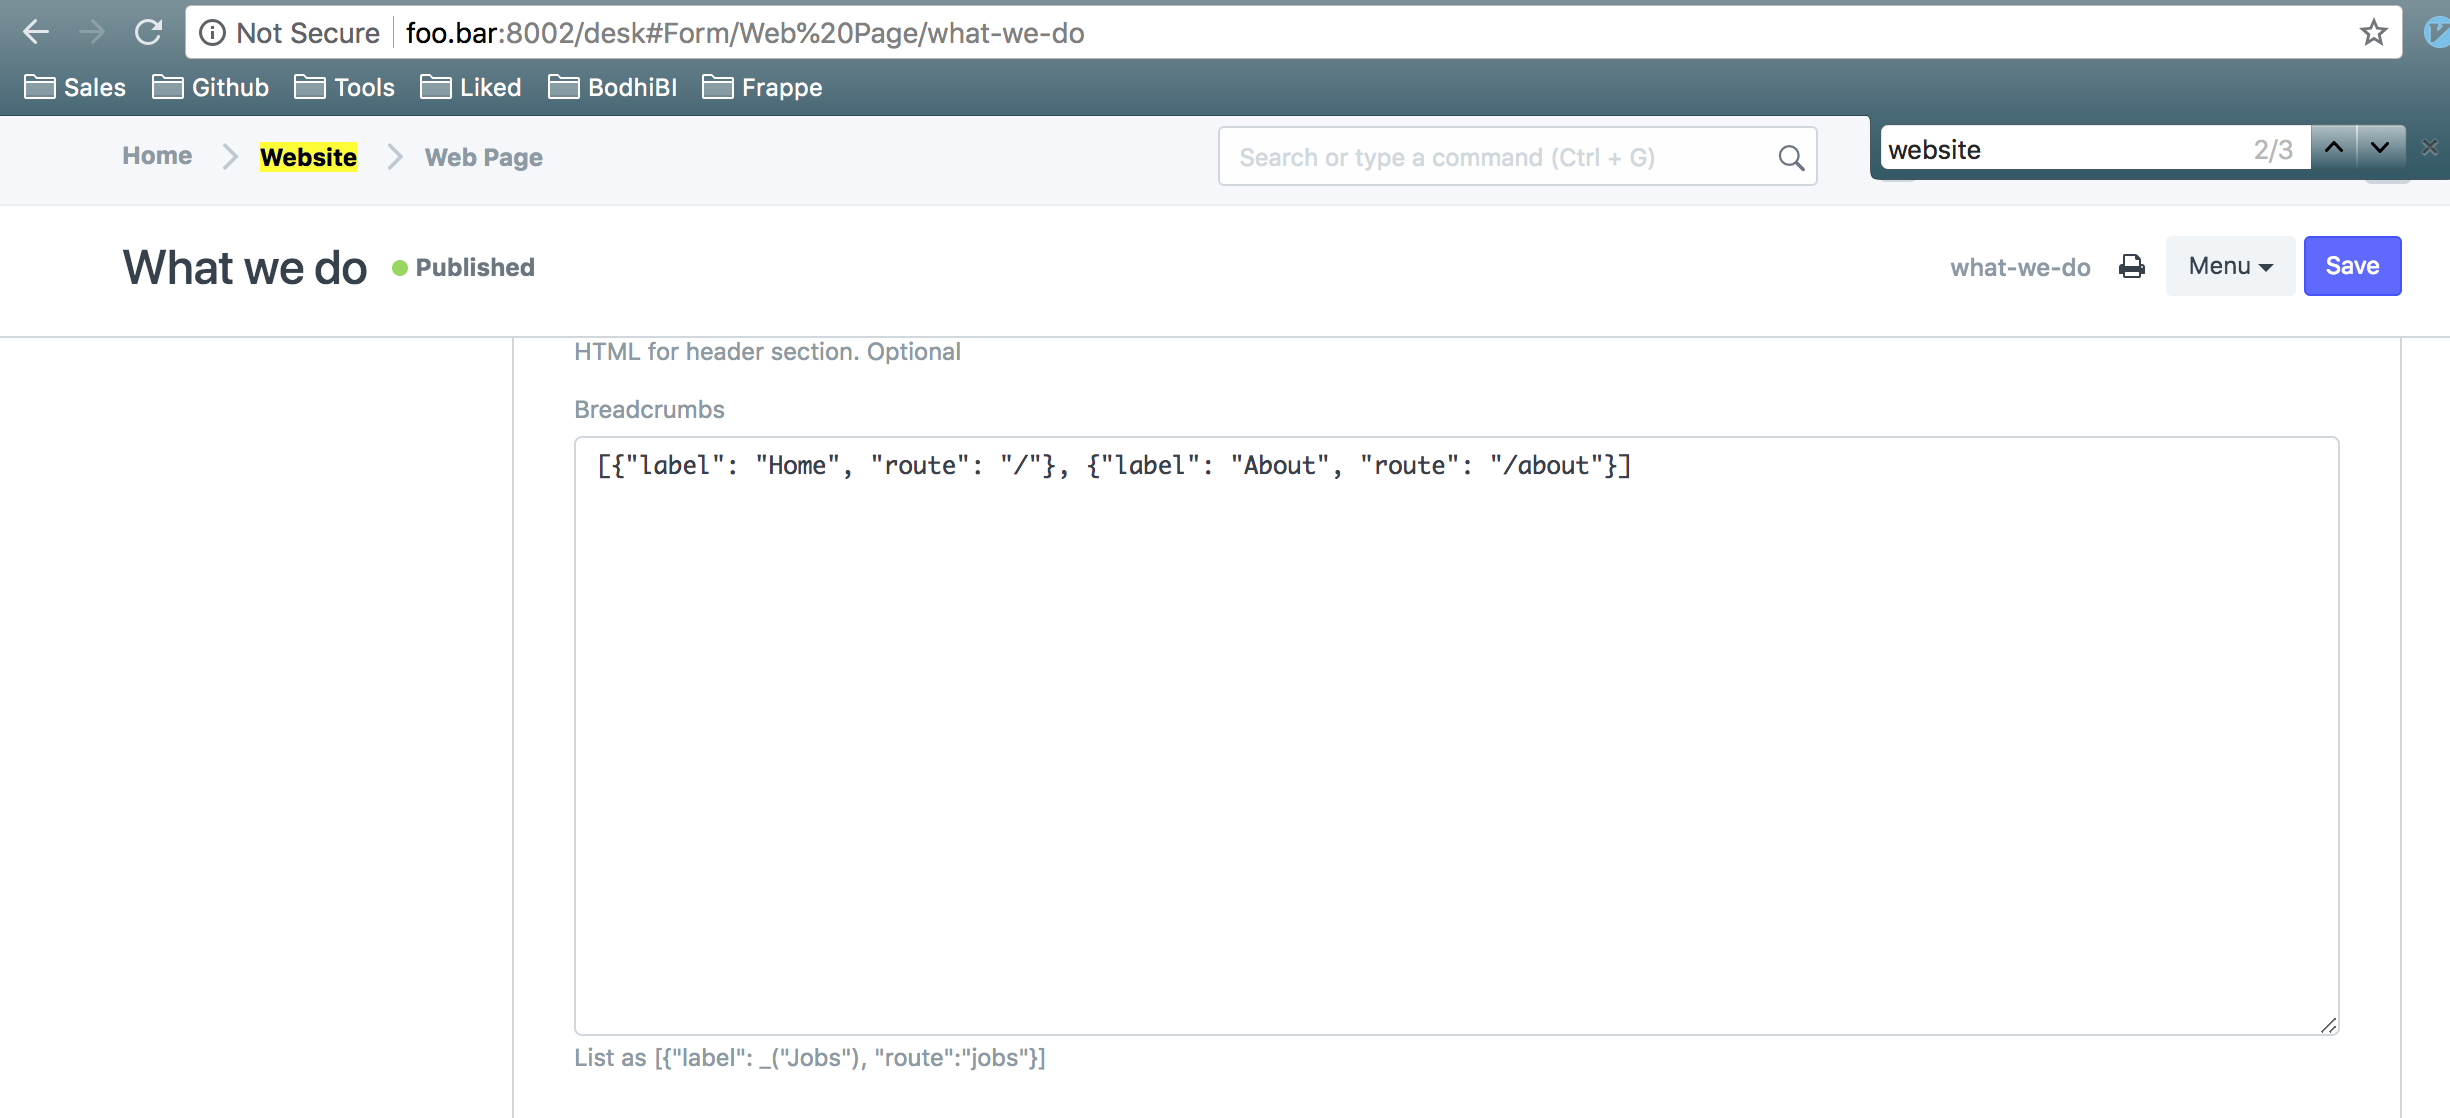
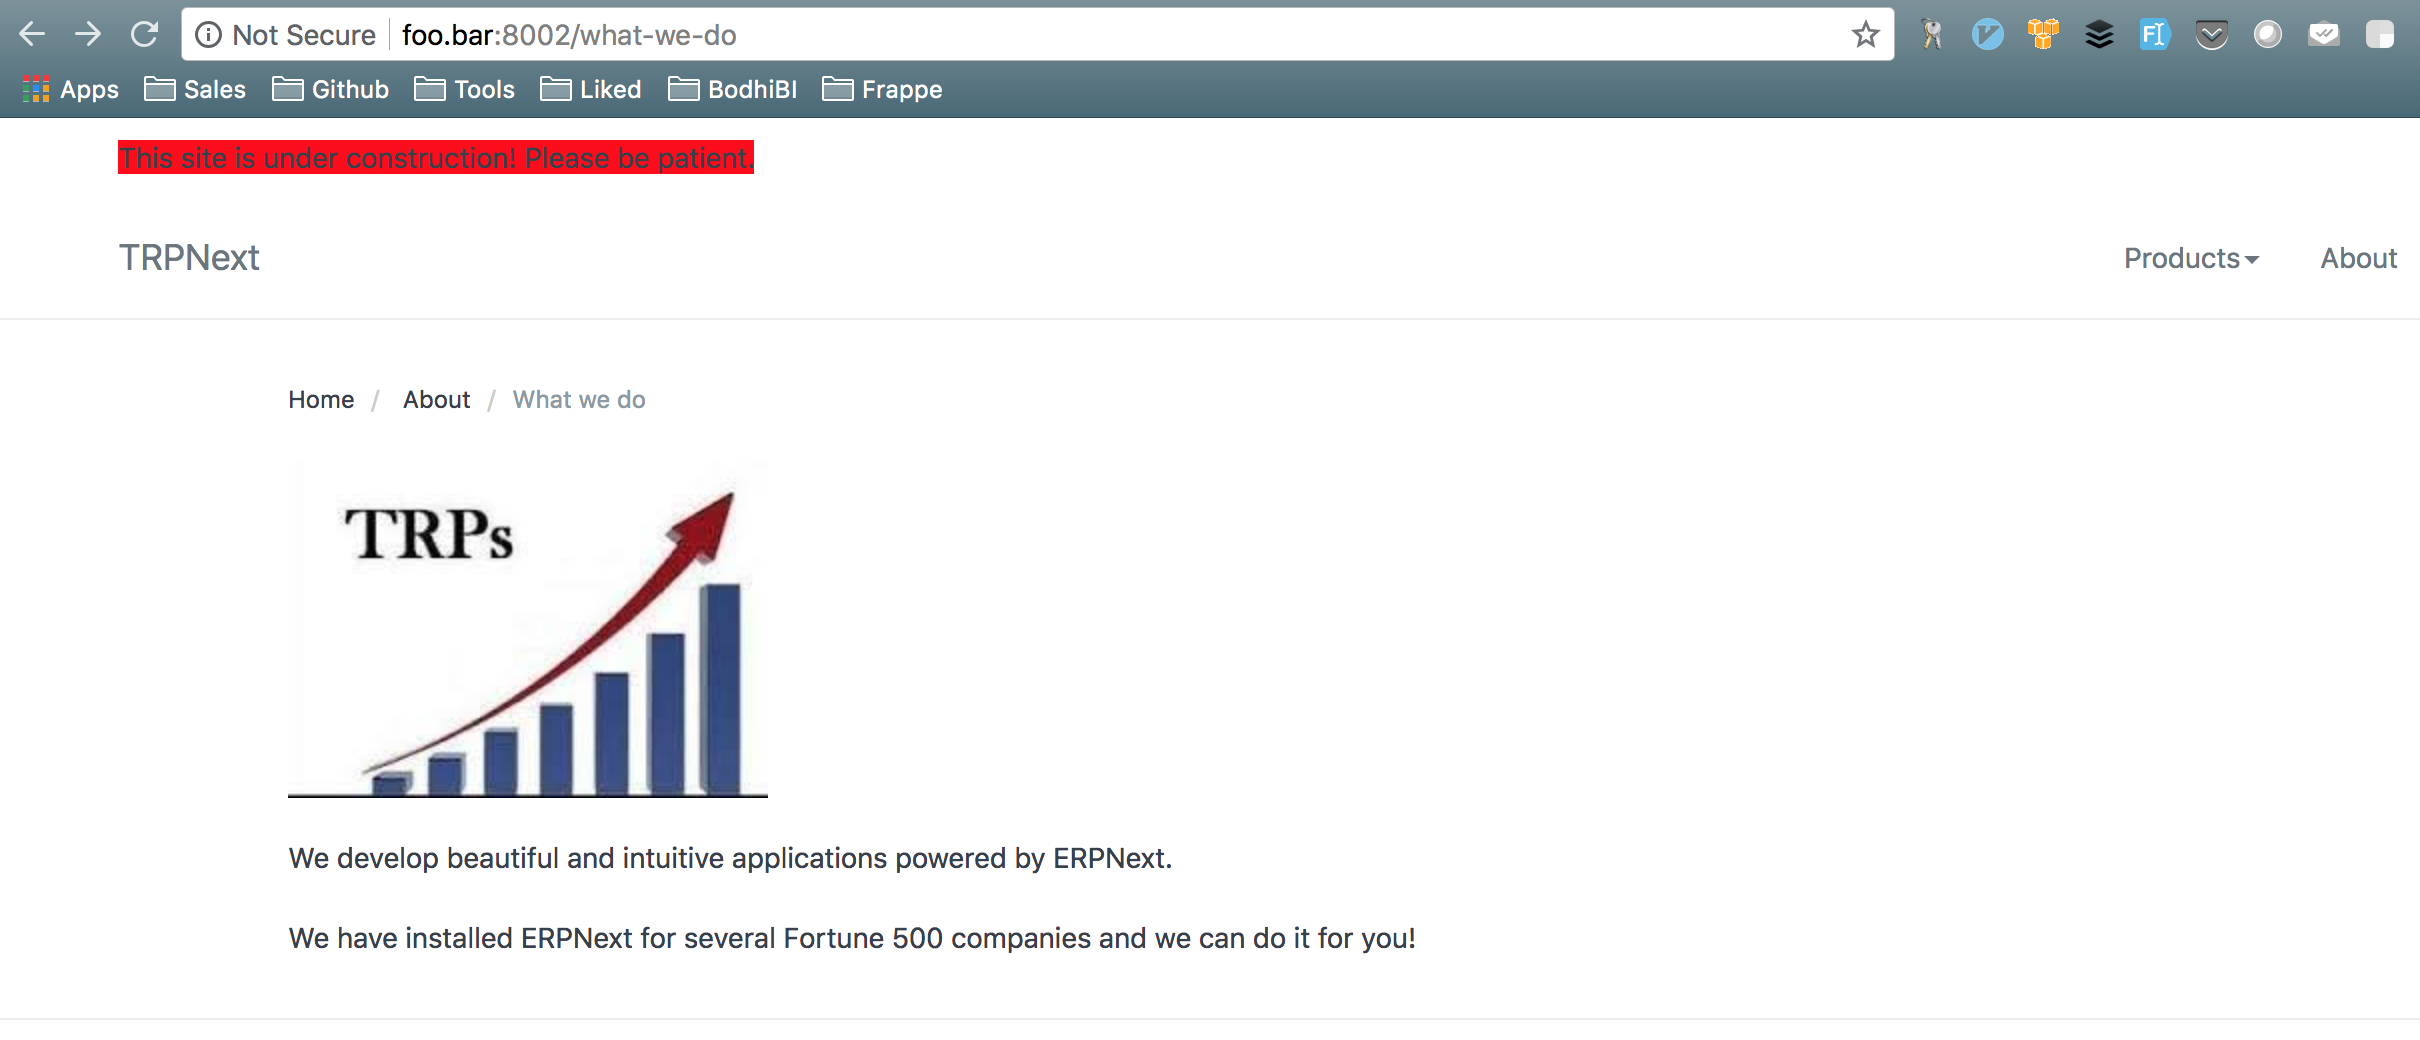
Your page should start looking like:
Adding custom style to page
You can add custom style by editing CSS of STYLE section.
Suppose we want to make the background-color as #fafbfc for navbar and footer.
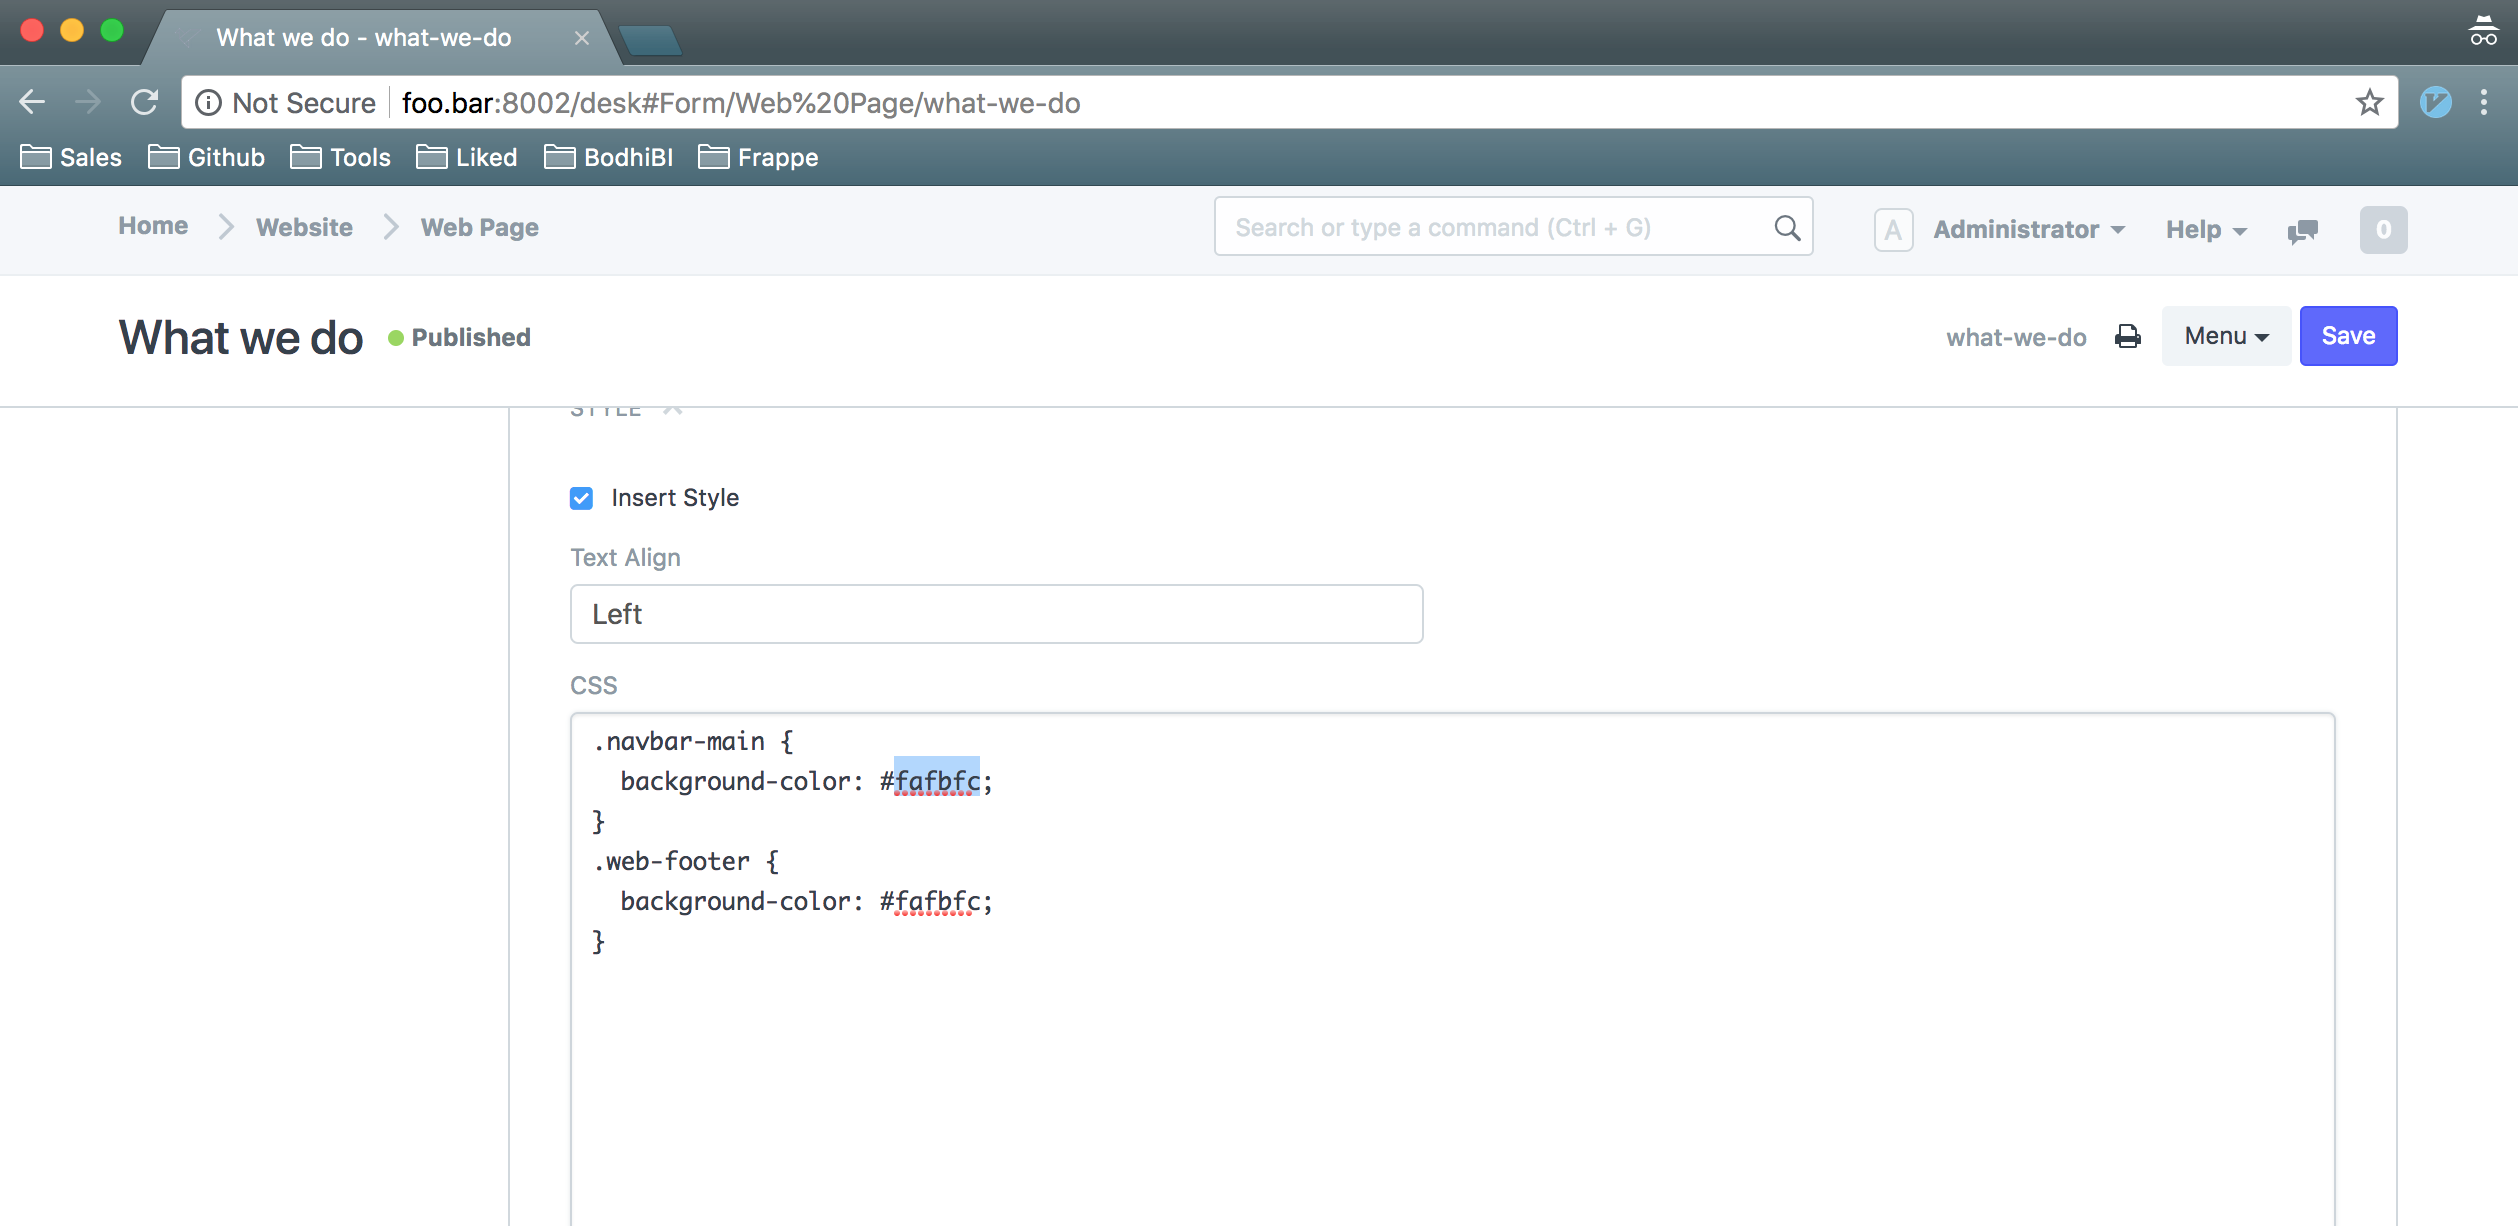
Navbar provided by Frappe webpages have class navbar-main, and footer has class web-footer. We exploited this knowledge to add custom css to our page.
You can inspect different elements on page to find out their classes and add appropriate styling.
If you want to know about any other customizations in your webpage, leave a comment and I can add it to the post.
Thank you for reading the Agiliq blog. This article was written by Akshar on Aug 19, 2018 in python , erpnext , frappe .
You can subscribe ⚛ to our blog.
We love building amazing apps for web and mobile for our clients. If you are looking for development help, contact us today ✉.
Would you like to download 10+ free Django and Python books? Get them here